
Sourdough Discard Crepes (Easy, Thin & Perfect Every Time)
Sourdough discard crepes are one of my favorite ways to use up extra discard. And trust me, once you make these, you’ll see why! They’re light, tender, slightly tangy, and perfect for sweet or savory fillings. Whether you’re flipping your first crepe or you’ve got a whole stack going, this recipe is easy, flexible, and packed with flavor.
Around here, pancakes are a fan favorite for breakfast, lunch, or dinner. And crepes are no different! Much like waffles, crepes are one of those fun meals that you can completely customize. Sweet or savory, simple or fancy, there are so many directions to go.
We love setting up a spread of our favorite fillings and toppings so everyone can build their own plate. It’s a great way to get the whole family involved and makes even an ordinary day feel a little extra special.

This post may contain affiliate links. Please read our disclosure policy.
Best Sourdough Discard For This Sourdough Crepes Recipe
After lots of testing, here’s what I’ve learned about choosing the best discard for crepes:
- Day-old discard is ideal: It blends smoothly into the batter and gives a mellow sourdough flavor.
- Unfed is perfect: No need to activate your starter; discard straight from the fridge (at room temperature) works great.
- Too old = too sour: If it’s been sitting for more than 3–4 days, it gets too acidic and won’t mix as well.
- You can use active starter: The texture will still work, but the flavor might be milder and the batter a bit thicker.
- Room temperature discard is easier to mix, but cold discard works too if blended well.
How to Make Sourdough Discard Crepes
This sourdough crepe recipe come together easily with a few simple ingredients and some helpful tips to set you up for success:
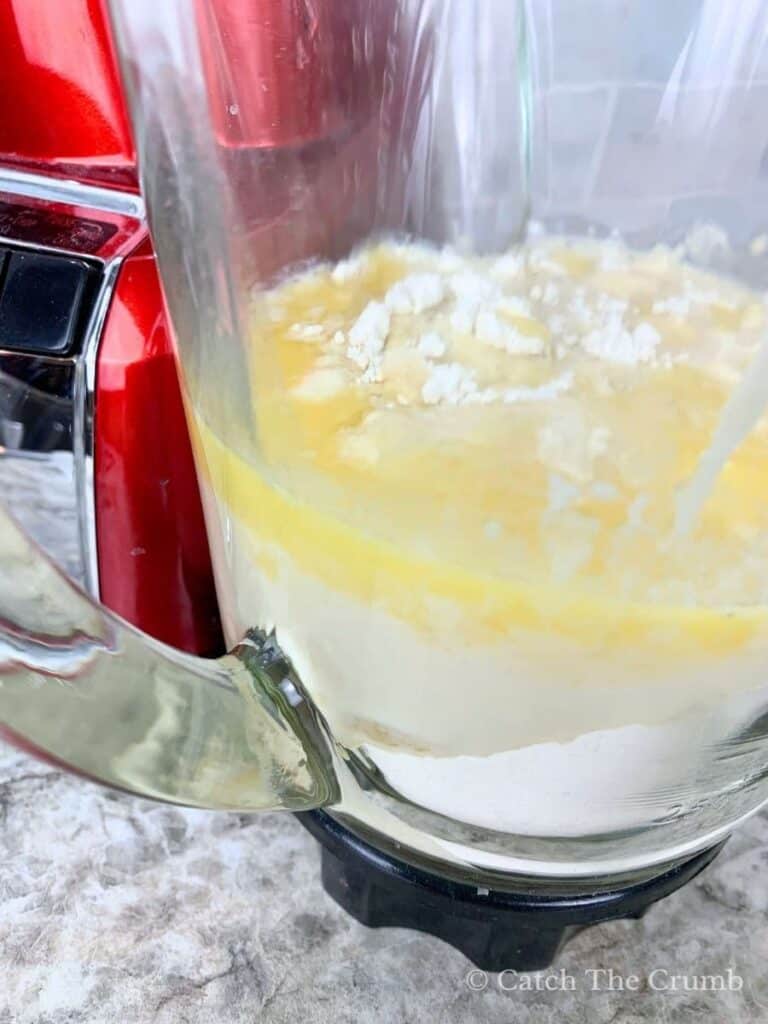
Step 1: Blend or whisk the batter
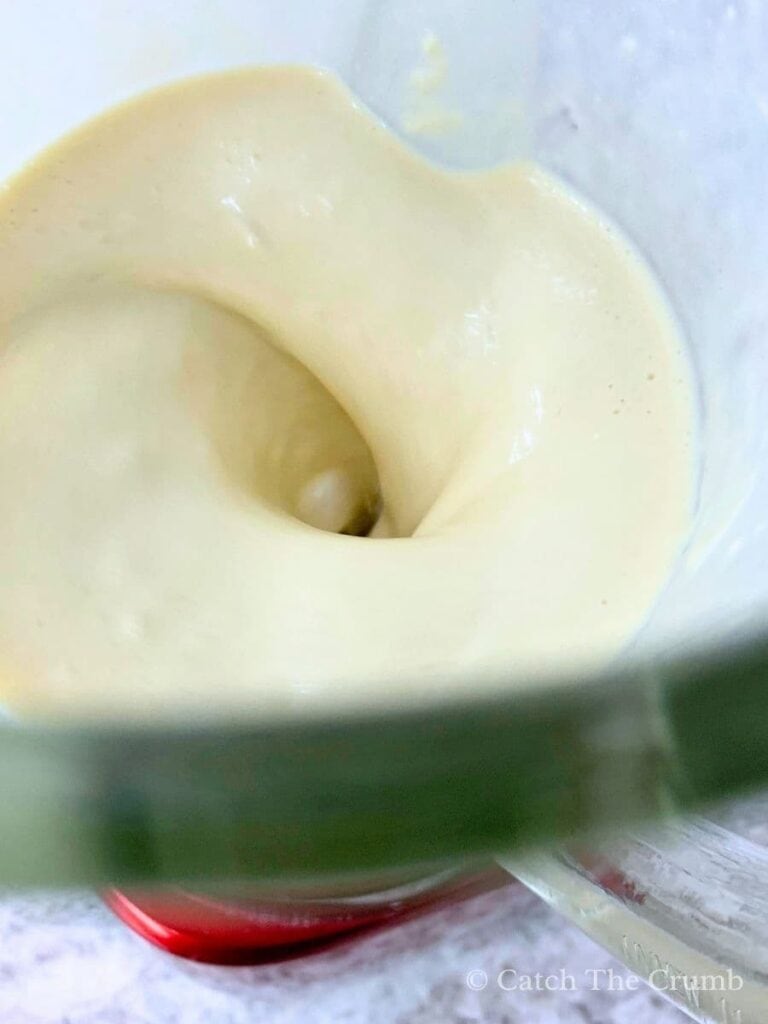
Add all of the ingredients to a large mixing bowl or blender at once. You can use a blender, whisk, or hand mixer, whatever you have on hand. Mix until the batter is smooth and has the consistency of heavy cream. Don’t overmix. Just combine everything until there are no lumps.
Step 2: Let the batter rest in the fridge
Rest the batter for at least 1 hour in the fridge. This gives the flour time to hydrate and makes the crepes more tender. Be sure to cover your bowl with a bowl cover or plastic wrap. Stir the batter gently if it separates after resting.
Step 3: Preheat your nonstick skillet properly
Use a non-stick skillet, nonstick pan, or crepe pan and set it over medium or medium-low heat. Let it fully preheat. You want the pan hot enough to sizzle the batter slightly, but not so hot that it browns too quickly.
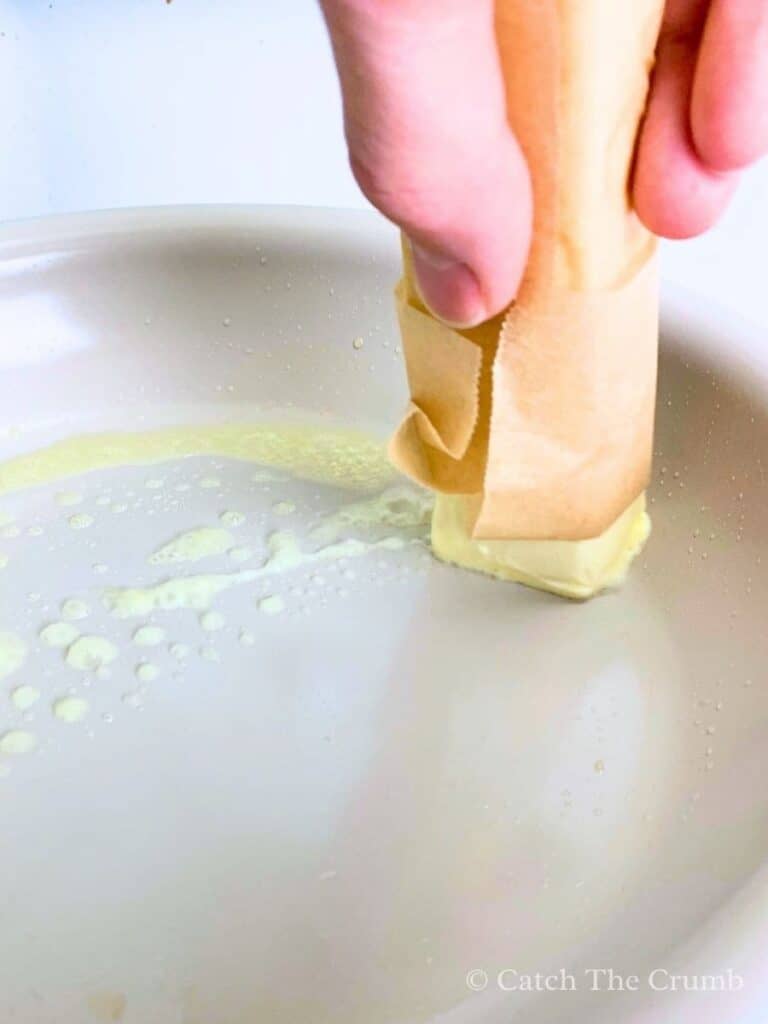
Step 4: Butter the preheated pan before each crepe
Rub the bottom of the pan with a stick of butter before each crepe. Fully coat the surface so your crepes don’t stick and you get those delicious crispy edges.
Step 5: Use the right amount of batter
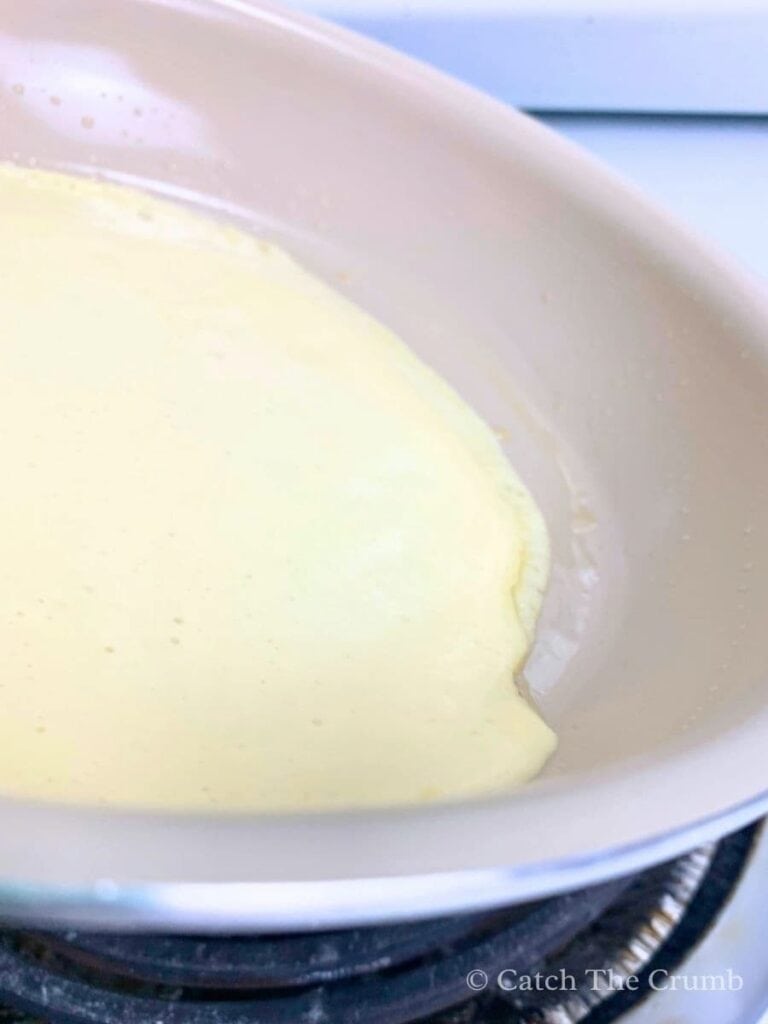
For an 8-inch skillet, use about 3 tablespoons of batter, we want to create very thin pancakes. For a larger pan (10–12 inches), aim for about ¼ cup of batter. Pour the sourdough crepe batter into the center of the pan and immediately swirl it in a circular motion to spread it thin and evenly.
Step 6: Cook until lightly golden brown on the first side
Let the crepe cook for about 1 to 2 minutes. You’ll know it’s ready to flip when the edges begin to crisp up and lift slightly from the pan. Let the crepe almost fully cook before flipping to ensure it doesn’t fall apart.
Step 7: Flip and cook the second side briefly
The second side only needs about 1 minute to finish cooking. Stack the crepes on a plate as you go and cover them with parchment paper or a clean kitchen towel to keep warm.
Step 8: Fill or top with your favorite toppings
Once all your crepes are cooked, it’s time for the best part, adding your favorite fillings and toppings! Roll them up with fresh fruit and maple syrup, fold them with cream cheese and jam, or go savory with scrambled eggs, cheese, or sautéed veggies. Whether you’re keeping it simple or going all out with a crepe bar, the possibilities are endless.

Tips for Simple Sourdough Discard Crepes
- Chill the batter: Don’t skip this! Resting the batter gives crepes a soft, tender texture.
- Butter between each crepe: A little butter helps each one release cleanly and adds flavor.
- Don’t worry about the first crepe: It’s usually the “test crepe” and helps you adjust the heat.
- Use the right pan: A nonstick or cast iron skillet with medium heat gives the best results.
- Practice the swirl: Tilt and twirl your pan as soon as the batter hits so it spreads evenly.
- Make ahead: Store leftover crepes in an airtight container in the fridge (up to 3 days) or freeze with parchment between each for up to 2 months.
Filling & Topping Ideas for Sourdough Crepes
These crepes are the perfect blank canvas! Here are some sweet and savory ways to enjoy them with your choice of fillings:
Sweet Fillings & Toppings
- Strawberry sauce: simmer strawberries with a little cane sugar and lemon juice
- Maple syrup and fresh fruit: classic combo
- Whipped cream and chocolate shavings
- Cream cheese Filling
- Nutella and bananas
Savory Fillings & Toppings
- Ham and cheese
- Spinach, mushrooms, and goat cheese
- Smoked salmon, cream cheese, and dill
- Fried egg, bacon, and avocado
- Herbed ricotta with roasted veggies
Sourdough Discard Crepes

Ingredients
- ½ cup (63g) all-purpose flour
- ½ cup (125g) sourdough discard (100% hydration, unfed)
- 2 large eggs
- ¾ cup (180ml) milk (dairy or plant-based)
- 3 tbsp (43g) melted butter (plus more for the pan)
- ⅛ tsp salt
- 1 tbsp (13g) sugar
- ½ tsp vanilla extract
Instructions
- In a blender or large mixing bowl, combine the flour, sourdough discard, eggs, milk, melted butter, salt, sugar and vanilla. Blend or whisk until the batter is smooth and the consistency of heavy cream.
- Cover the batter and place in the fridge for at least 1 hour (or up to overnight). This helps make the crepes tender and smooth. Stir gently before using if it looks separated.
- Heat a nonstick skillet or crepe pan (8-inch works best) over medium or medium-low heat. Allow it to fully preheat.
- Lightly butter the bottom of the pan using a stick of butter before each crepe.
- Pour 3 tablespoons of batter into the center of the pan. Immediately lift and swirl the pan in a circular motion to spread the batter into a thin layer.
- Let the crepe cook for 1–2 minutes, or until the edges look dry and begin to lightly brown. Let the crepe almost fully cook before flipping so that it doesn’t tear apart.
- Flip the crepe and cook the second side for about 1 minute. Transfer to a plate and cover to keep warm.
- Repeat with the remaining batter, buttering the pan between each crepe for best results.
- Fill or top with your favourite toppings.
Notes
- Discard that’s no more than 2 days old is best. Too sour or too old and the flavor can overpower the crepe.
- The batter should be smooth and pourable like heavy cream.
- An 8-inch nonstick skillet, cast iron pan, or crepe pan gives you the best control.
- Make sure to fully butter the pan between each crepe to prevent sticking and get those dreamy crispy edges.
- Store cooled crepes in an airtight container in the fridge for up to 3 days, or freeze with parchment between each crepe for up to 2 months.
Did you try this recipe? I’d love to see how it turned out! Leave a comment below and tag @catchthecrumbsourdough on Instagram to show it off!