
Easy Apple Pie Sourdough Bread
If you love the tang of sourdough and the cozy sweetness of homemade apple pie, you’re going to fall head over heels for this apple pie sourdough bread!
It’s the perfect addition to your sourdough journey, bringing together juicy apples, warm spices, and a crusty loaf that smells just like fall. This delicious treat is a great way to use your active sourdough starter and enjoy all the flavor of a classic apple pie filling baked right into tangy sourdough bread.
Whether you’re a seasoned sourdough baker or just getting started, this recipe is simple, satisfying, and guaranteed to impress. Grab a large mixing bowl, slice up some fresh apples, and get ready to make some magic with this cozy apple pie sourdough bread!

This post may contain affiliate links. Please read our disclosure policy.
Ingredients You’ll Need for Apple Pie Sourdough Bread
This apple pie sourdough bread starts with a simple, rustic dough and gets a boost of flavor from a warm, spiced apple filling. Here’s what you’ll need to bring it all together:
For the Dough
- active sourdough starter
- warm water
- all-purpose flour
- sea salt
For the Apple Pie Filling
- Fresh apples (Granny Smith or other tart apples work well, but you can use whatever you like or have on hand)
- Brown sugar
- Cinnamon
- Nutmeg
You’ll mix the apple mixture with warm spices and sugar to create a cozy, caramelized filling that melts right into the loaf during baking. It’s a delicious nod to classic apple pie filling tucked into a rustic sourdough loaf.
Tools You’ll Need for Making Sourdough Apple Pie Bread
Before you start, these are the tools you’ll need for a smooth baking experience:
- Kitchen Scale to correctly measure your ingredients
- Food Thermometer
- Large mixing bowl
- Small bowl for the filling
- Plastic wrap or a damp towel
- Banneton or something similar for your cold proof
- Piece of parchment paper
- Dutch oven or cast iron pot with lid
- Baking sheet (optional)
- Sharp knife or lame for scoring
- Wire rack for cooling
- Airtight container for storing leftovers
How to Make Apple Pie Sourdough Bread
Step 1: Feed Your Starter
Before you can mix your dough, you’ll need 75g of active sourdough starter. It should be bubbly, well-fed, and at least doubled in size.
You can adjust your feeding ratio depending on your schedule:
- For an overnight rise: Feed your starter the night before using a 1:5:5 ratio. For example, mix 10g starter + 50g water + 50g flour. This slows down fermentation, so your starter peaks in about 10–12 hours, perfect for mixing your dough in the morning. This feeding will give you around 110g of starter, so you may want to scale it up slightly if you want more than 35g to maintain your starter.
- For a same-day bake: Use a 1:1:1 ratio: 40g starter + 40g water + 40g flour, about 4–6 hours before baking. This is a great way to bake on your schedule and still get the best results. This feeding gives you 120g total, this will make sure you have enough for your apple pie sourdough bread and extra to keep your starter going strong.
Step 2: Mix the Dough
In a large mixing bowl, combine your wet ingredients. Be sure to stir well to fully dissolve the starter into the water.
- 75g active sourdough starter
- 330g warm water
Next, add your dry ingredients:
- 500g all purpose flour
- 8g sea salt
Mix everything together until a shaggy dough forms. Don’t be afraid to get in there with your hands or a sturdy spoon. It’s important that all the flour is fully hydrated and no dry bits remain. A couple of minutes of mixing at this stage helps kickstart gluten development and gives your dough a strong foundation.
Once everything is well combined and the dough feels cohesive (even if still a little rough), cover the bowl with plastic wrap or a damp towel and let it rest at room temperature for 1 hour. This rest period helps the flour absorb the water and relax the gluten. This makes the dough easier to work with later.
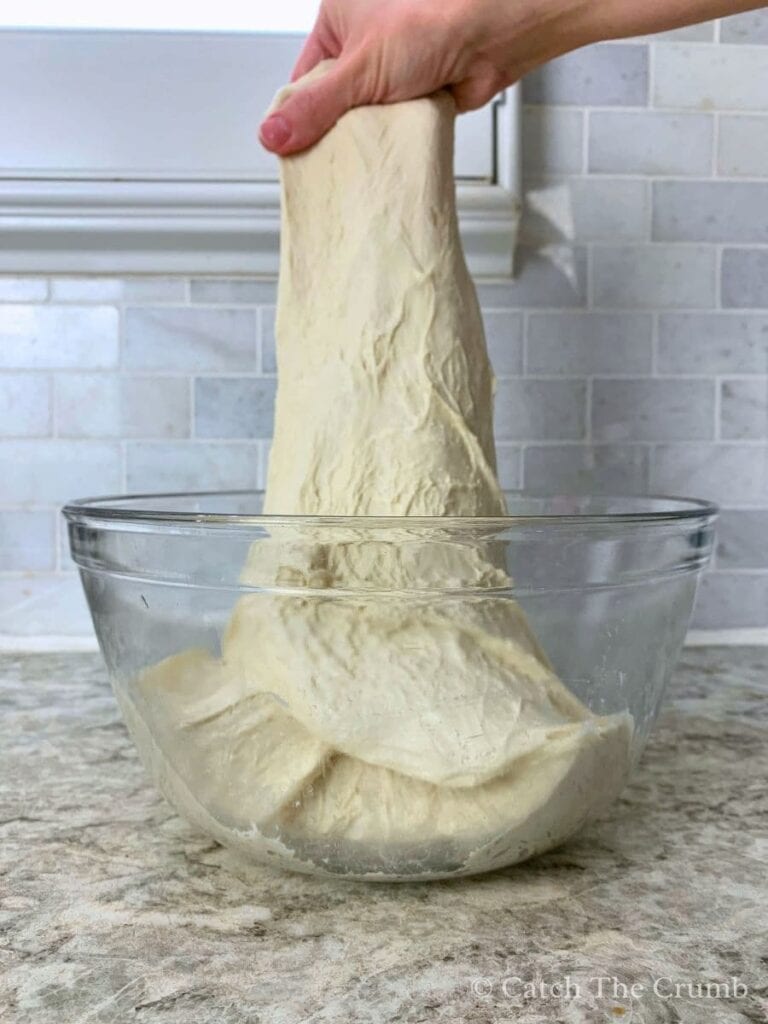
Step 3: Stretch and Folds
After the 1-hour rest, it’s time to begin your stretch and folds which is an essential part of developing strength in your dough.
With the dough still in the large bowl, wet your hand slightly, then gently grab one side of the dough, stretch it upward, and fold it over onto itself. Turn the bowl a quarter turn and repeat. Continue until you’ve done 4 stretches around the bowl. If the dough still feels slack, you can do a few extra stretches (around 8–10 total) until it starts to tighten up and offer some resistance.
You’ll repeat this process every 30 minutes for a total of 4 rounds. Keep the dough covered with plastic wrap or a damp towel in between folds to prevent it from drying out.
For the last couple of rounds, feel free to switch to coil folds if you’d like. To do a coil fold, gently lift the center of the dough with both hands, let the ends drape down, and tuck them under as you lower the dough back into the bowl. Coil folds are a little gentler and help preserve the air bubbles that begin to form during the fermentation process.
After your final fold, cover the dough and let it rest in a warm place until it finishes bulk fermenting. It should look puffier, smoother, and hold its shape a bit better when gently tugged at the side of the dough.
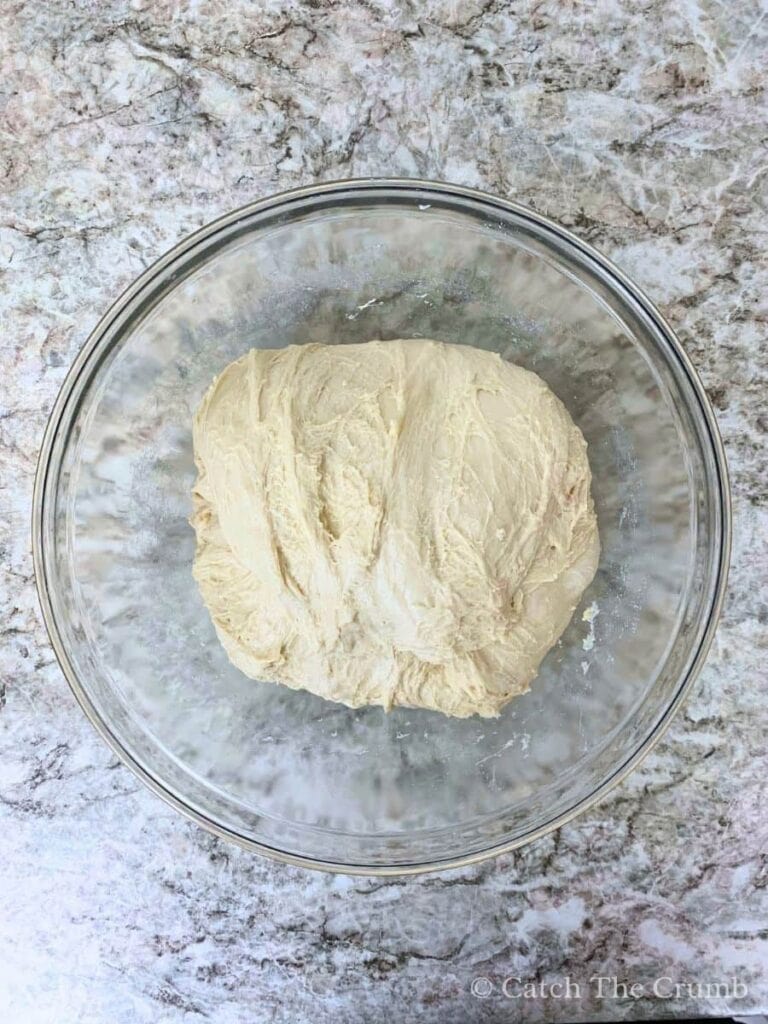
Step 4: Bulk Fermentation
Now that your stretch and folds are done, it’s time to let the dough rest and ferment. Just remember, bulk fermentation begins the moment you mix in your active sourdough starter, not after the folds.
You might see charts or timelines with exact hours, but the best tool you have is learning to read your dough. Over time, you’ll start to recognize the signs that it’s ready to move on to the next step.
Look for a dough that’s soft, airy, and slightly domed on top. You’ll start to see bubbles forming along the sides of the bowl, and when you gently shake the bowl, it should give a nice jiggle, almost like jello. If you poke the top of the dough, it should feel puffy and a little springy.
Don’t be afraid to push it a little longer if you’re unsure. Slightly overproofed dough often bakes up better than underproofed. If your dough feels dense or hasn’t really changed shape or texture, it likely needs more time.
My dough temperature usually sits around 80°F, and at that temperature, bulk fermentation typically takes 4–5 hours for me. But every kitchen is different, so use these numbers as a guide, not a rule. If your dough is closer to 70°F, expect it to take more like 8-12 hours. The best thing you can do is keep an eye on how the dough looks and feels. It’ll let you know when it’s ready!
Step 5: Prepare the Apple Pie Filling
Now that bulk fermentation is done, it’s time to make the cozy apple pie filling that brings this loaf to life!
Start by dicing up about 200g of apples. That’s roughly 2 medium-sized apples. You can use any variety you like, but tart apples like Granny Smith apples are a classic go-to for that perfect sweet-tangy balance. Chop them into small chunks, around ½ inch in size, just right for folding into the dough without overwhelming it.
In a bowl, stir together:
- 40g brown sugar
- 1 tsp cinnamon
- ¼ tsp nutmeg
Once combined, toss your chopped apples into this spiced sugar mixture and give everything a good stir so the apples are nicely coated.
Next, heat 1 tsp of butter in a small skillet over medium heat. Add the apples and cook for 5–8 minutes, stirring occasionally, until they soften and the mixture thickens.
Once it’s done, set the apple mixture aside to cool to room temperature before you fold it into your dough. Warm filling can mess with fermentation and make the dough harder to work with, so give it a little time to chill out.
If you’re short on time (or just not in the mood to cook), you can totally skip the step of cooking the apples on the stove. I tested both methods while developing this recipe, and honestly, they both turned out delicious!
Cooking the apples first does make them softer and more “apple pie-like,” but if you don’t mind a little bite in your filling, feel free to skip the skillet and go straight from the bowl to the dough. It’s your loaf, you make the rules!
Step 6: Stretch the Dough Into a Rectangle & Add Inclusions
Normally this would be the time for a preshape. But since we’re about to stretch out the dough to add our apple pie filling, we’re going to skip it to keep things easy and gentle on the dough.
Before you begin, go ahead and line your banneton with a clean towel and give it a generous sprinkle of flour or rice flour. Trust me, this step is a must! The filling can get a little sticky, and skipping this step could make a mess of your banneton. Lining it helps prevent your filling from oozing onto your banneton.
Now, turn your dough out onto a lightly floured work surface, or spritz your countertop with a little water to help prevent sticking. Be gentle here, we want to keep all those beautiful air bubbles we’ve worked so hard to build!
Using your hands, gently stretch the dough into a large rectangle. You want it thin enough to hold the filling well but not so thin that it tears. As a reference, I usually stretch mine to about the size of my cutting board (roughly 16×12 inches).
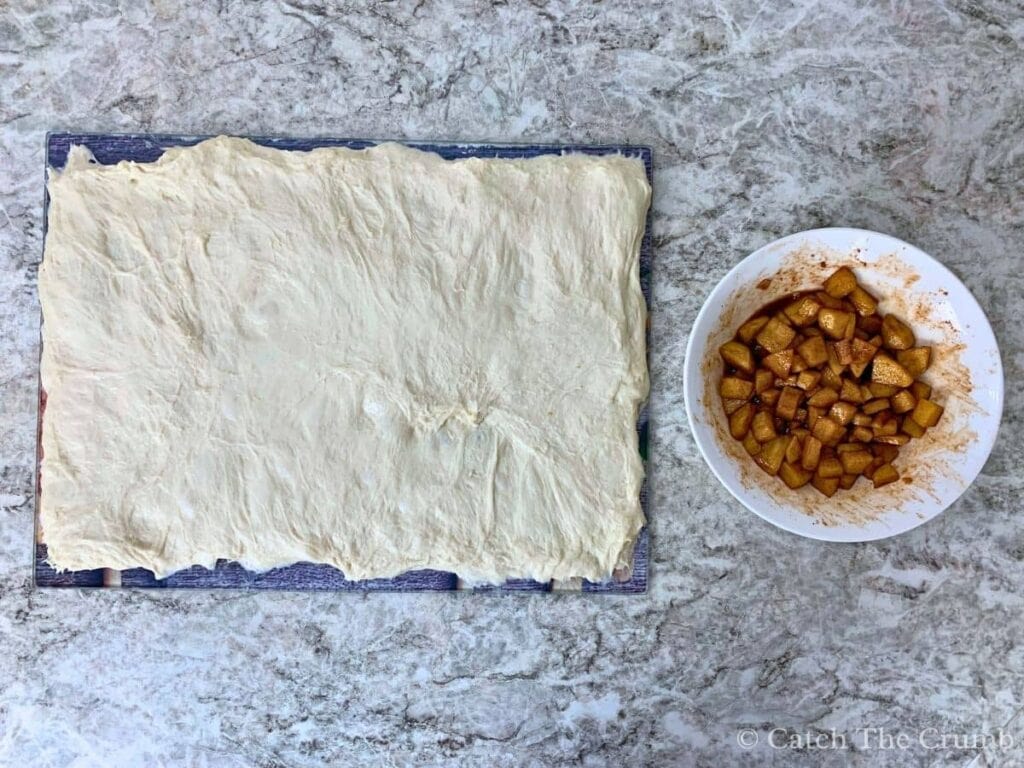
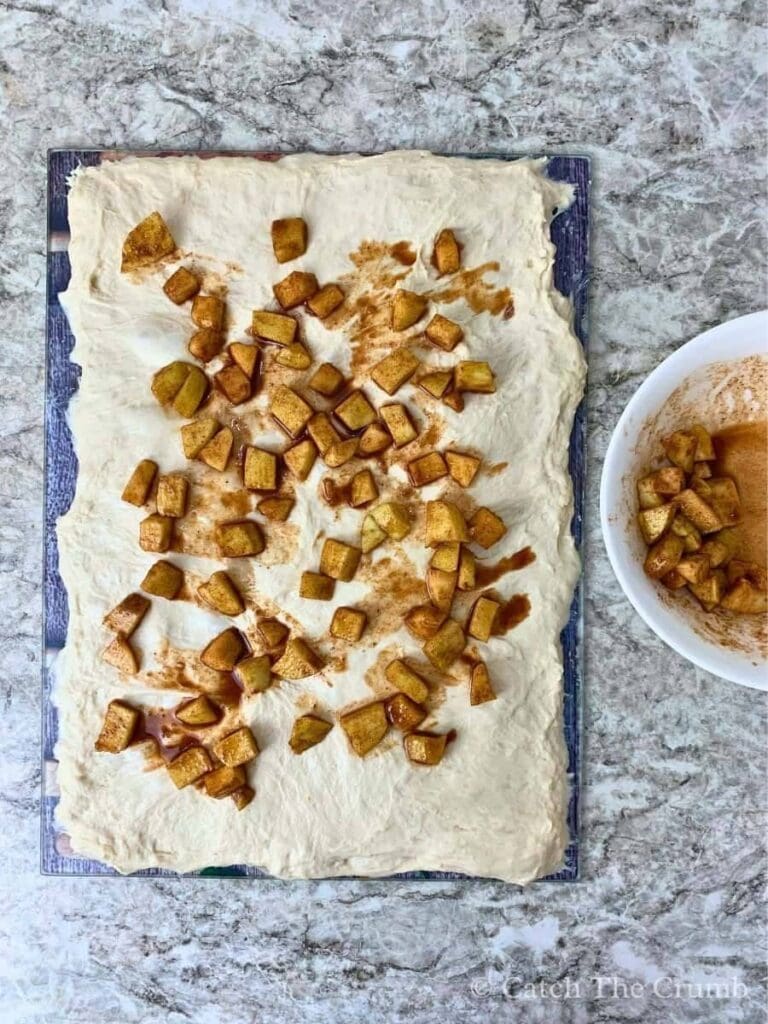
Once your dough is stretched out, spread ¾ of your cooled apple pie filling evenly over the surface.
Now it’s time to fold things up:
- First, fold one short side of the dough toward the center.
- Then fold the opposite side over it, like folding a letter.
Next, spread the remaining ¼ of the filling across the top of the folded dough.

Now gently roll the dough up, being as careful as possible to avoid tearing. A bench scraper helps if your dough is sticking to your surface.
If you’re making a boule, gently round out the dough before placing it into your banneton.
If you’re making a batard, just flip your dough into your lined and floured banneton seam-side up.
Try not to mess with the dough too much at this point, just make sure the seams are sealed. If you spot any open seams, give them a gentle pinch to close things up without squeezing out the filling.
Step 7: Cold Proof
Once your dough is snug in the banneton, it’s time to pop it into the fridge for a long, chilled rest. This cold proof gives the dough time to develop structure, deepen flavor, and make scoring easier later on.
Cover your banneton with a reusable cover, shower cap, or plastic wrap, and place it in the fridge for at least 8 hours, or up to 2 days if needed.
But here’s my gentle nudge: just go overnight if you can! Since this is a sweet loaf, too long in the fridge can start to bring out tangy sourdough notes, and we want those cozy apple pie flavors to shine.
Step 8: Bake
About an hour before you’re ready to bake, preheat your oven to 450°F (232°C) and place your Dutch oven inside to heat up. I also like to slide a baking sheet onto the rack under my Dutch oven to help prevent the bottom of the loaf from getting too dark (especially helpful with all that sweet apple filling!).
Once your oven is fully preheated, carefully remove your dough from the fridge and remove the plastic wrap. Cut a piece of parchment paper and gently flip your dough onto it so the seam side is now facing down.
Now it’s time to score your dough! Use a sharp knife or bread lame to create a score to help your loaf expand beautifully in the oven.
Transfer the dough (on the parchment paper) into your hot Dutch oven. Bake for 30 minutes with the lid on.
Then, remove the lid and bake for another 10–15 minutes, until your crust is deep golden brown and the internal temperature reaches 205–210°F (96–99°C).
Your kitchen is going to smell amazing!
Step 9: Cool & Enjoy
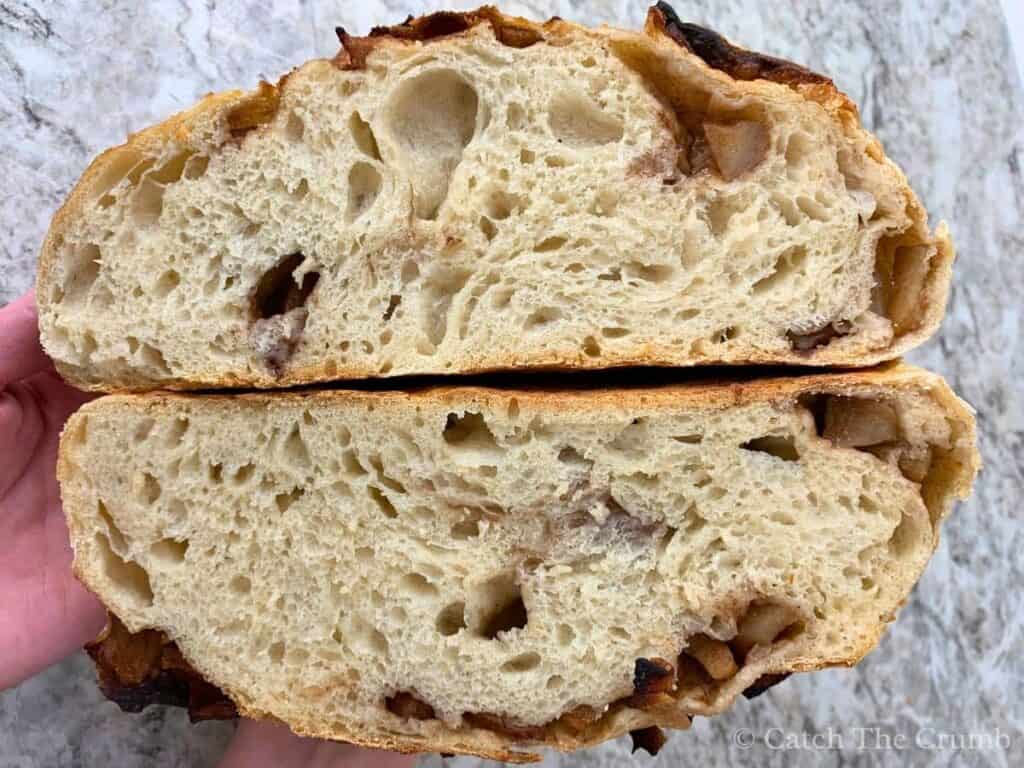
Once your apple pie sourdough bread is out of the oven, transfer it to a wire rack and let it cool completely before slicing. I know it’s tempting, your kitchen smells amazing, but this step is so important!
Slicing too early can lead to a gummy interior, and we definitely want that crumb to be soft, airy, and just right. So give it time to cool, then slice in and enjoy every bite of your sweet, spiced masterpiece.
If you liked this recipe, I think you’ll love…
Apple Pie Sourdough Bread

Ingredients
Main Dough
- 75 g active starter
- 330 g warm water
- 500 g all purpose flour
- 8 g sea salt
Homemade Apple Pie Filling
- 200 g apples (about 2), diced into ½ inch small pieces
- 40 g brown sugar
- 1 tsp cinnamon
- ¼ tsp nutmeg
- 1 tsp butter (for cooking)
Instructions
- Feed your starter. Make sure your sourdough starter is active, bubbly, and at least doubled in size before using. You’ll need 75 g.
- In a large bowl, mix your active sourdough starter and warm water. After thoroughly combined, add all-purpose flour and sea salt. Mix until a shaggy dough forms. Cover and rest for 1 hour.
- Perform 4 rounds of stretch and folds, spaced 30 minutes apart. Keep dough covered between folds. After the last fold, let the dough rest at room temperature until puffed and bubbly (4–8+ hours depending on dough temperature). See Step 4 above for more details.
- In a small bowl, mix brown sugar, cinnamon, and nutmeg. Chop your apples into ½-inch chunks, then toss them in the cinnamon mixture until well coated. Heat about 1 tsp of butter in a skillet over medium heat. Cook the apple mixture for 5–8 minutes, until the apples soften slightly and the sugars thicken into a syrupy coating. Let cool before using.
- Line your banneton basket with a tea towel and flour generously with rice flour or all-purpose flour. Gently stretch the dough into a rectangle about 16×12 inches. Evenly spread about ¾ of the apple filling over the surface, leaving a border around the edges. Starting from one short side, gently fold the dough toward the center. Repeat on the other side so it’s folded like a letter. Carefully roll the dough into a log, then shape it into a boule or leave it as a batard. Place seam-side up in your prepared banneton.
- Cover and place the dough in the fridge overnight (or for up to 2 days) for the final rise.
- Place a Dutch oven with the lid on into your oven and preheat to 450°F (232°C). To help prevent the bottom of your loaf from burning, you can place a cookie sheet on the rack below. When ready to bake, cut a piece of parchment paper and gently flip your dough onto it. Score the top with a sharp blade or lame.
- Carefully transfer your dough (with the parchment paper) into the hot Dutch oven. Cover and bake for 30 minutes. Then remove the lid and bake for another 10–15 minutes, or until the crust is golden brown and crisp. The internal temperature should reach 205–210°F (96–99°C).
- Let your bread cool on a wire rack for at least 1 hour before slicing. Enjoy!
Notes
- Storage: Once cooled, store your loaf in an airtight container at room temperature for up to 2 days. For longer storage, place it in a freezer bag and freeze. Just make sure to slice it before freezing for easy portions!
- Cool-Down Tip: Don’t skip the cool-down! Cutting into the bread too early can result in a gummy texture inside. Let your loaf rest for at least an hour for the best results.
- Experiment and Enjoy: Baking sourdough is a rewarding journey, and this recipe is a perfect way to experiment with different flavors while keeping the process approachable. Feel free to add your favorite spices or fillings for a personalized twist!
Did you try this recipe? I’d love to see how it turned out! Leave a comment below and tag @catchthecrumbsourdough on Instagram to show it off!