
Easiest Sourdough Bread Recipe (Beginner-Friendly!)
If you’re looking for the easiest sourdough bread recipe that actually works the first time, you’re in the right place. This is the perfect loaf to kick off your sourdough journey. No complicated steps, no commercial yeast, and no special equipment required (though I’ll suggest a few tools that make things easier). Just simple ingredients, clear instructions, and a beautiful, golden brown crust to pull from your oven!
This post may contain affiliate links. Please read our disclosure policy.
Sourdough baking can feel overwhelming, especially when you’re brand new to it. But this recipe is proof that with the right guidance, you absolutely can bake a gorgeous, crusty loaf of homemade sourdough bread on your first try!
And if you’re not new to sourdough and just want a simple, reliable recipe to add to your rotation, this loaf is a great option. It’s low-maintenance, beginner-friendly, and delivers amazing flavor every single time.
The Only 4 Ingredients You Need To Make The Easiest Sourdough Bread Recipe
You don’t need a long list of ingredients or anything fancy to make incredible sourdough bread at home. Just four real, recognizable ingredients:
- All-purpose flour: Some sourdough bakers swear by bread flour for a chewier texture, but I actually prefer using all-purpose flour. It makes a softer loaf, is easier to work with, and most people already have it in their pantry. So that’s what we’re using in this recipe. Just make sure it’s unbleached, which helps keep your starter healthy and active.
- Warm water: You want your water to be warm, but not too hot. The warmer your water, the faster your dough will ferment. The cooler it is, the slower the rise. Don’t use water hotter than about 115°F as it can kill your starter and your bread won’t rise. I usually use filtered water from my Brita and warm it to about 90°F by microwaving it.
- Sea salt: Any sea salt will do! Some bakers prefer fancy flaky salts or specific mineral blends, but honestly? I don’t think it makes a huge difference. Use what you’ve got and don’t stress over it.
- Sourdough starter: This is the most important ingredient and it’s what gives your bread life. A sourdough starter is a live culture made from just flour and water. Over time, wild yeast and friendly bacteria from your kitchen environment begin to thrive in the mixture. When it’s active and bubbly, it becomes your natural leavening agent. Basically the powerhouse behind every rise in sourdough baking.
If you’re new to sourdough, there are three easy ways to get your hands on a starter:
- Make your own from scratch using just flour and water. It’s a simple process, but it does take a patience. Your starter will need a few weeks of daily feedings before it’s strong and active enough to bake with. That said, there’s something really rewarding about creating your own starter from the ground up.
- Buy a dehydrated starter from a trusted source. These are easy to rehydrate and a great option if you want a mature, reliable starter without waiting a week to build your own. I actually bought my own starter on Amazon from a well-established sourdough baker, and it’s been thriving ever since!
- Get some from a friend or local bakery who already bakes sourdough. Most bakers are more than happy to share, since we usually have extra!
That’s it. No preservatives, no added sugars, no seed oils, no ingredients you can’t pronounce. Just clean, honest, homemade bread that puts the store-bought stuff to shame.
Whichever route you take, once you have an active starter, you’re ready to bake, and this recipe is the perfect place to begin.
Once you bake this loaf, you’ll see exactly why so many of us never go back to buying bread in plastic bags again. There’s something deeply satisfying about crafting a loaf from start to finish, watching wild yeast do its thing, seeing the dough rise, and slicing into a golden, crackly crust that you made with your own hands.
It only takes one loaf to fall in love with the art of sourdough. And trust me, after that first bite, you’ll be hooked!
Recommended Tools For Making Sourdough Bread
You don’t need a fully stocked kitchen to bake sourdough, but a few key tools will make your life a whole lot easier.
If you’re just getting started and want a simple way to gather the essentials, this sourdough starter kit is a great option. It includes most of what you’ll need, minus a few basics you’re likely to already have around the house (like a large bowl, a food thermometer, or a kitchen scale).
Below, I’ll walk you through each tool, what it’s for, whether it’s essential or just helpful, and what you can use as a substitute if you don’t have it yet.
The Essentials (Start With These!)
- Sourdough Starter: This one’s non-negotiable. It’s the living culture (just flour and water!) that makes sourdough rise. Whether you make your own or get one from a friend or online, your starter is the heart of every loaf.
- Large Mixing Bowl: You’ll use this for mixing your dough and letting it rise during bulk fermentation. It doesn’t need to be fancy. it just needs to be made of glass, ceramic, plastic, or stainless steel, and large enough for your dough to double in size.
- Kitchen Scale: Sourdough baking is all about ratios and hydration levels, so accurate measurements matter more than in other types of baking. A kitchen scale helps you measure flour and water in grams for consistent results every time (Spoiler: Cups are just too unreliable for sourdough!).
- Food Thermometer: This is especially helpful when you’re new. Fermentation is temperature-sensitive. You can check your dough temperature to make sure it’s in the ideal range and confirm your loaf is fully baked by checking the internal temperature (about 205–210°F). Any basic kitchen thermometer works!
- Parchment Paper: This makes transferring your proofed dough into a hot Dutch oven so much easier, and it helps prevent sticking. If you bake a lot, a silicone bread sling is a reusable alternative.
- Plastic Wrap or Plastic Bag: To cover your bowl or proofing basket and keep the dough from drying out. A damp tea towel also works well, just make sure it’s not too wet or heavy or it may deflate your dough. You can also use bowl covers or shower caps.
Nice to Have (But Not Required)
- Dutch Oven: This is a game-changer for beginner bakers. It traps steam, which gives your loaf that crisp, blistered crust and a great oven spring (rise). If you don’t have one, try using a covered roasting pan.
- Bench Scraper: Sticky dough is no joke. A bench scraper helps you lift, fold, and shape the dough without making a mess or losing half of it to your countertop. It also helps build tension on your dough to create a beautiful crust.
- Bowl Scraper: This is a softer, flexible tool that helps you clean out every last bit of dough from your bowl without wasting any. Not essential, but nice to have.
- Proofing Basket or Banneton: These give your dough structure during the final rise. But you don’t need one! A colander lined with a clean kitchen towel dusted with rice flour works perfectly and gives your loaf great shape.
- Razor Blade or Sharp Knife (for scoring): Scoring allows the bread to expand in the oven without splitting randomly. A razor blade (called a bread lame) makes a clean cut, but a sharp kitchen knife will do the job if that’s what you have.
Don’t feel like you have to buy everything right away. Start with the essentials: your starter, a big bowl, a scale, a thermometer and something to bake in and build from there as you fall in love with the process (because you will!). Even with a very basic setup, you can make a crusty, golden brown loaf that’s better than anything on the grocery store shelf.
Once you get into the rhythm of sourdough baking, it won’t feel like a big project anymore. It becomes part of your week, your routine, and honestly, your lifestyle. And there’s something really satisfying about knowing you can bake fresh, delicious bread whenever you want with no preservatives, no fillers, and no mystery ingredients.
What Is Sourdough Bread?
Sourdough bread is a naturally leavened bread, meaning it rises without the use of commercial yeast. Instead, it relies on wild yeast and beneficial bacteria that are cultivated in a mixture called a sourdough starter. This gives sourdough its signature tangy flavor, chewy texture, and that beautifully blistered crust.
It’s one of the oldest forms of bread-making, and while it may sound fancy or intimidating, it’s really just flour, water, salt, and time. No additives, no shortcuts, just a slow fermentation process that results in bread that’s easier to digest, more flavorful, and full of character.
How to Make the Easiest Sourdough Bread Recipe
Let’s walk through the process step-by-step. I’ll break everything down clearly so you’ll know exactly what to do and what to expect at each stage. No guesswork, no stress!
Step 1: Feed Your Starter
Before you can start mixing your dough, your sourdough starter needs to be active and bubbly. Think of this like waking it up and getting it ready to do its job, which is to make your bread rise!
Here’s exactly what you need to do:
Feed your starter about 10–12 hours before you plan to start baking. I usually do this the night before, just before bed. That way, it’s at its peak and ready to go in the morning when I’m ready to mix the dough.
What does “peak” mean? After you feed your starter, it will rise as the wild yeast and bacteria start feeding on the fresh flour and water. You’ll know it’s ready when it has at least doubled in size, looks fluffy and airy, and has just started to level off at the top or stops rising. That’s peak activity, and that’s the sweet spot for baking.
How to feed your starter: I use a 1:5:5 ratio of starter to flour to water. It’s an easy way to build a strong, active starter that’s ready to rise your dough. For this recipe, before bed mix together:
- 10g starter
- 50g all-purpose flour
- 50g filtered water (around room temperature)
Stir it all together in a clean jar or container, cover it loosely, and let it sit at room temperature overnight. This will give you 110g of starter, just enough for the recipe plus a little extra to keep your starter going after you bake.
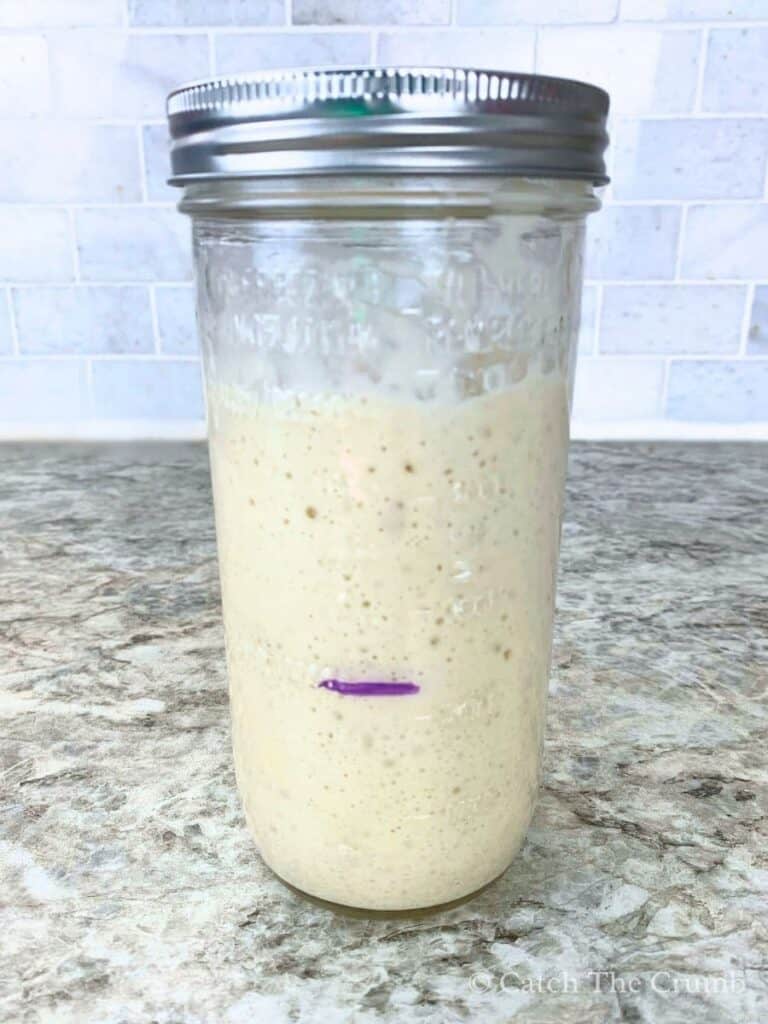
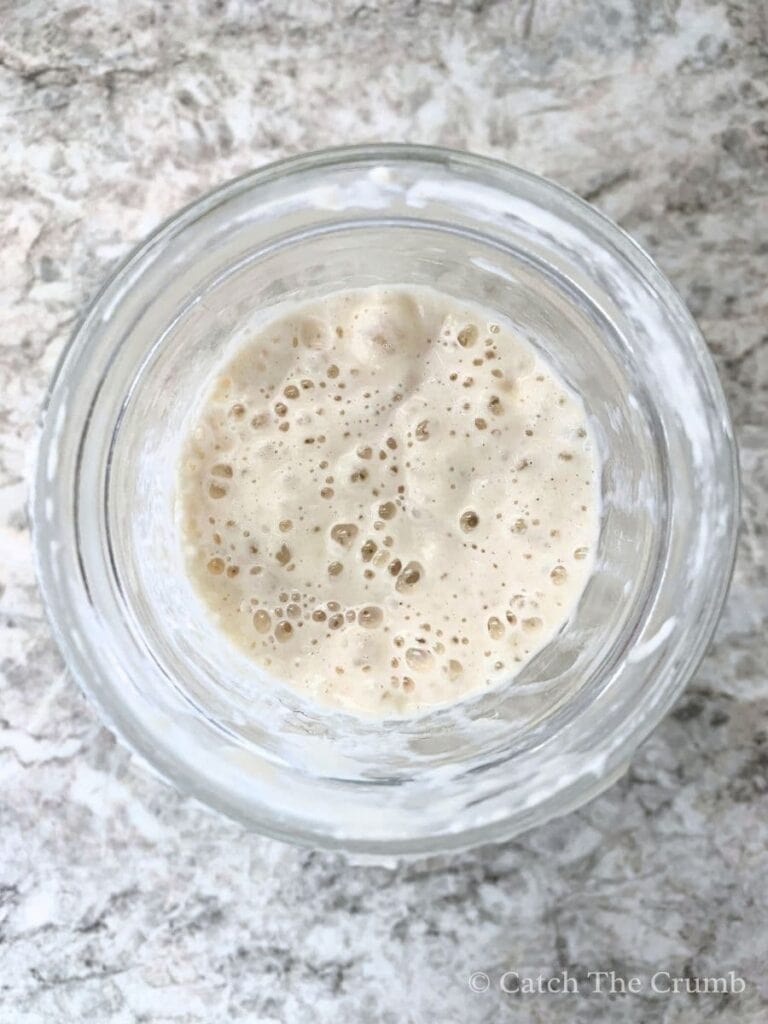
Little trick: I like to draw a line on my jar (or use a rubber band) to mark where the starter begins after feeding. That way, it’s easy to see when it’s doubled and ready to use.
Another Trick: Here’s a good indicator to know if your sourdough starter is ready to use: try the float test. Just drop a small spoonful of starter into a glass of room temperature water. If it floats on top, that means it’s full of air and ready to bake with!
Quick Tip: If you’d rather feed your starter in the morning and mix your dough around lunch or early afternoon, use a 1:1:1 feeding ratio. It ferments faster and peaks in about 4–6 hours. Just mix together 40g starter, 40g flour, and 40g water, and you’ll be good to go by midday to start mixing your dough.
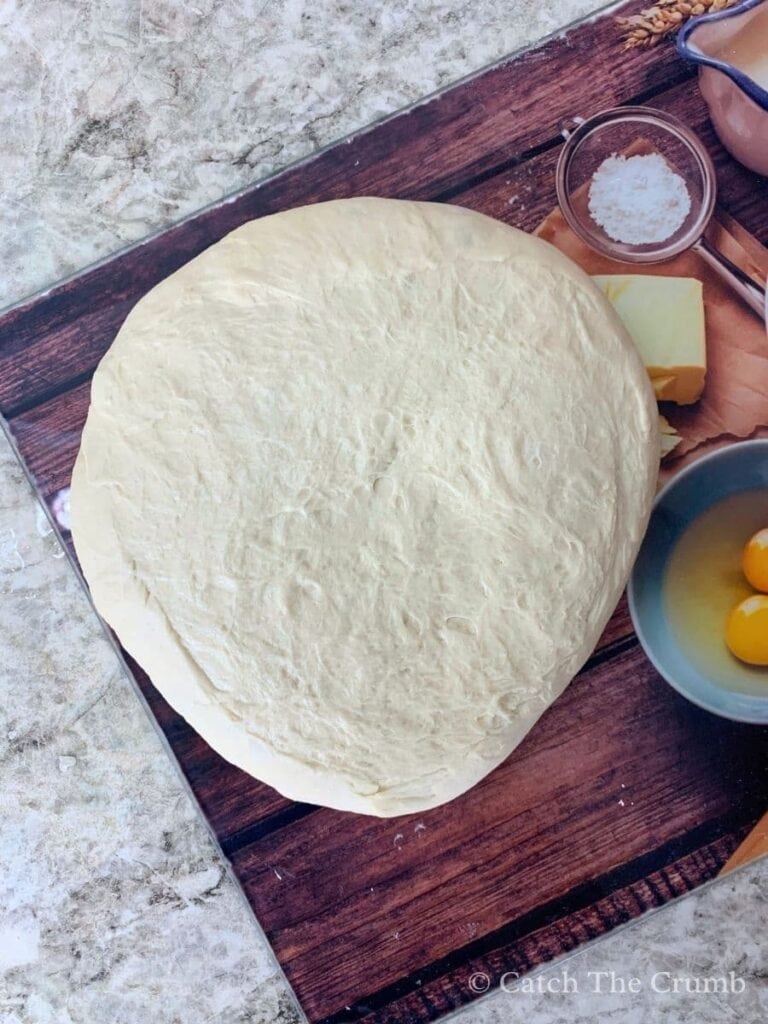
Step 2: Mix Your Dough
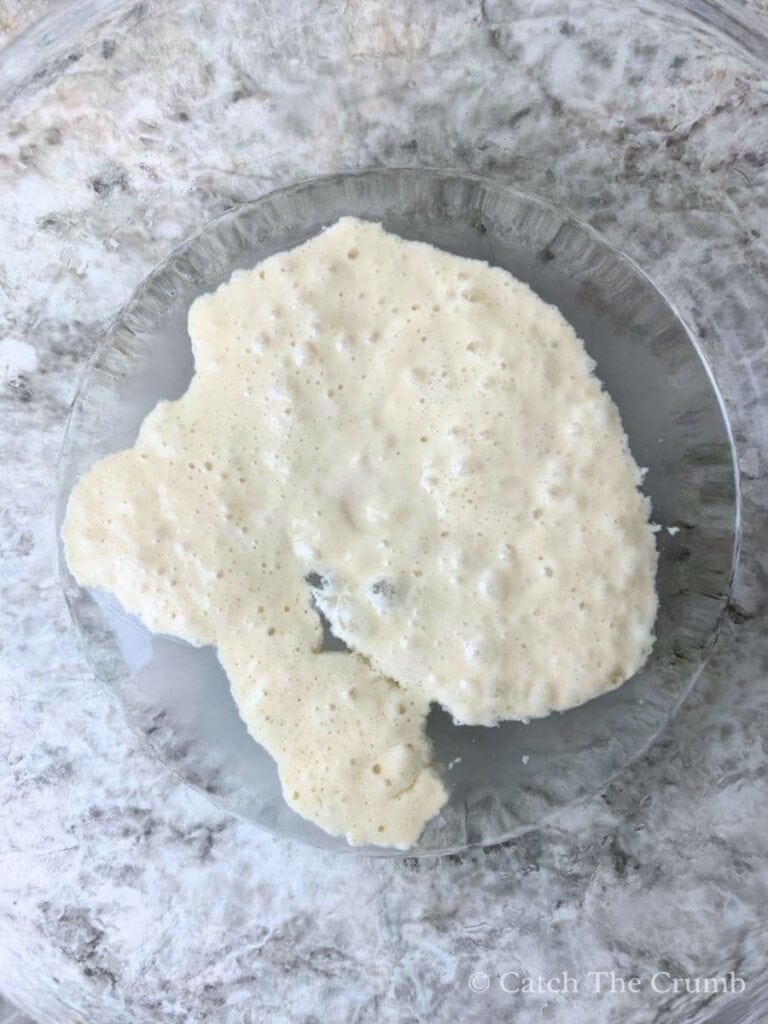
Once your sourdough starter has peaked, it’s go time! That means it’s bubbly and at least doubled in size.
Need a quick reminder of what a peaked starter looks like? It should be fluffy, filled with bubbles, and either domed on top or just beginning to level off. If you’re unsure whether it’s peaked, here’s a little trick: Draw a line on your jar with a dry-erase marker. Then check it 30 minutes later. If it hasn’t risen any more, it’s likely peaked and ready to use!
Here’s what you’ll need for one loaf of sourdough bread:
- 330g warm water
- 75g active sourdough starter
- 500g unbleached all-purpose flour
- 10g sea salt
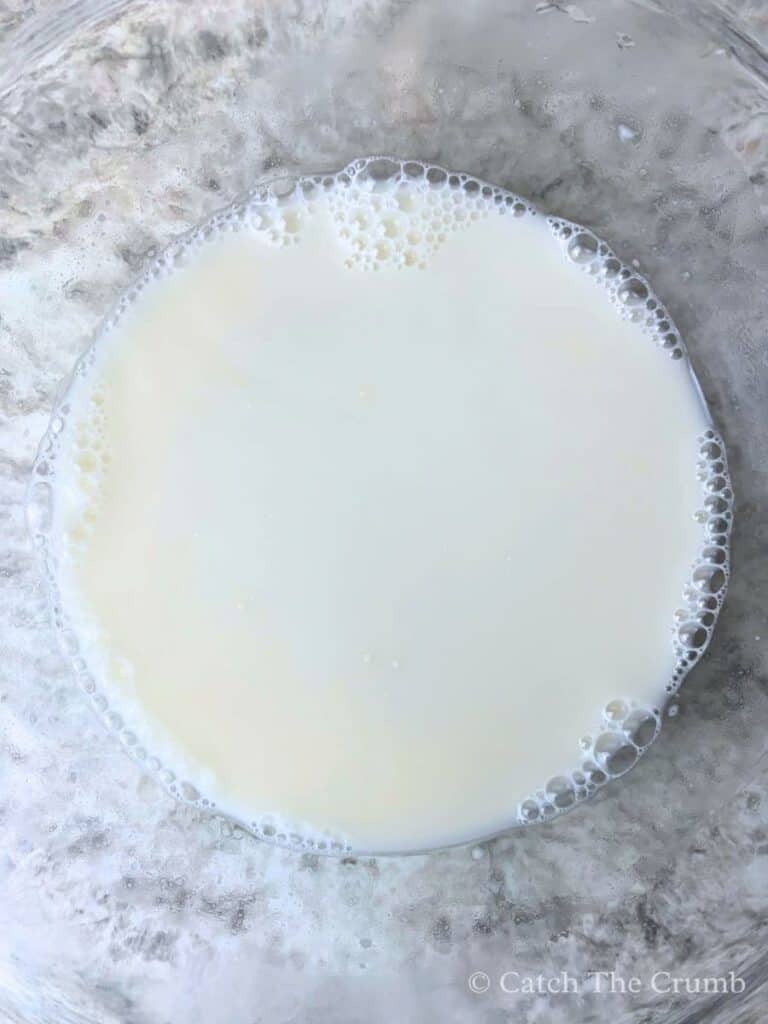
Start by pouring 330g of warm water into a large mixing bowl. I like to use water around 90°F. This helps speed up the bulk fermentation and gives your dough a nice head start.
Next, add 75g of your active sourdough starter. Use a fork, small whisk, or Danish whisk to stir the starter into the water until the mixture looks cloudy and a bit frothy, kind of like milky water.
Now, add 500g of unbleached all-purpose flour and 10g of sea salt. Begin mixing everything together. A Danish whisk is helpful here, but a fork or silicone spatula works just as well. The dough will get thick and sticky quickly. Don’t worry, that’s totally normal!
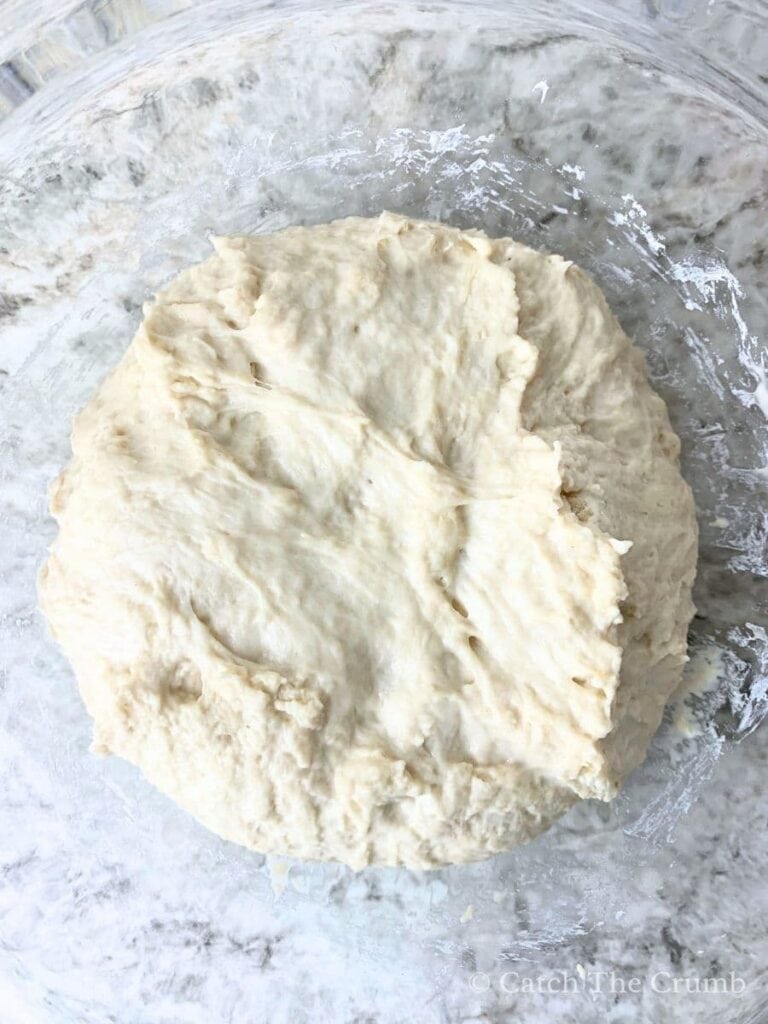
As the dough comes together, you can switch to using your hands if you’d like. It’ll feel a little rough and shaggy at this point, which is exactly what we want. If you’re up for a little extra effort, give the dough a few minutes of kneading right in the bowl. This helps it start to build some strength early on.
Once everything is fully combined and no dry flour remains, cover the bowl with a damp towel, plastic wrap, or a bowl cover. Then, let the dough rest for 1 hour.
Take note of the time as this is when bulk fermentation begins.
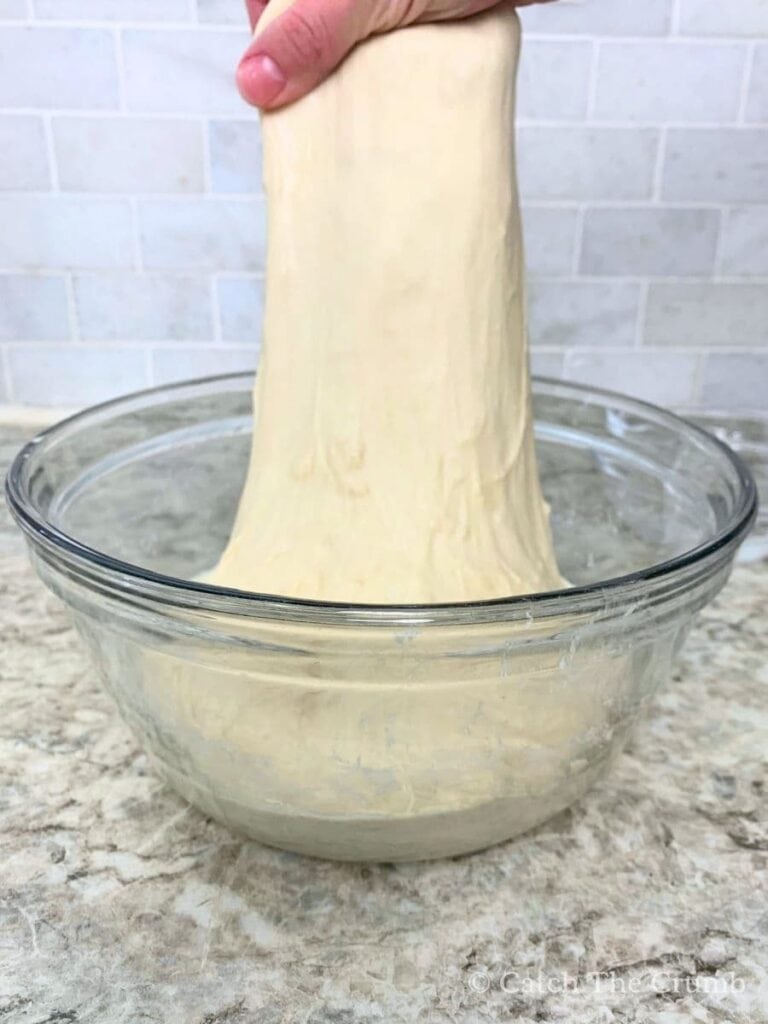
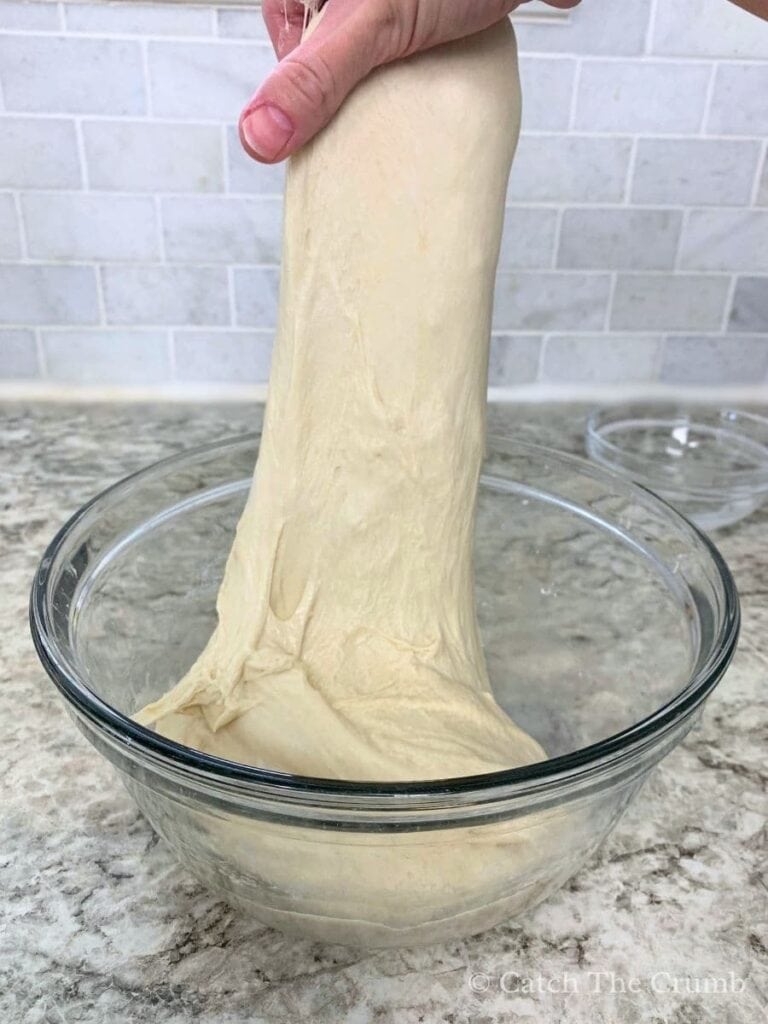
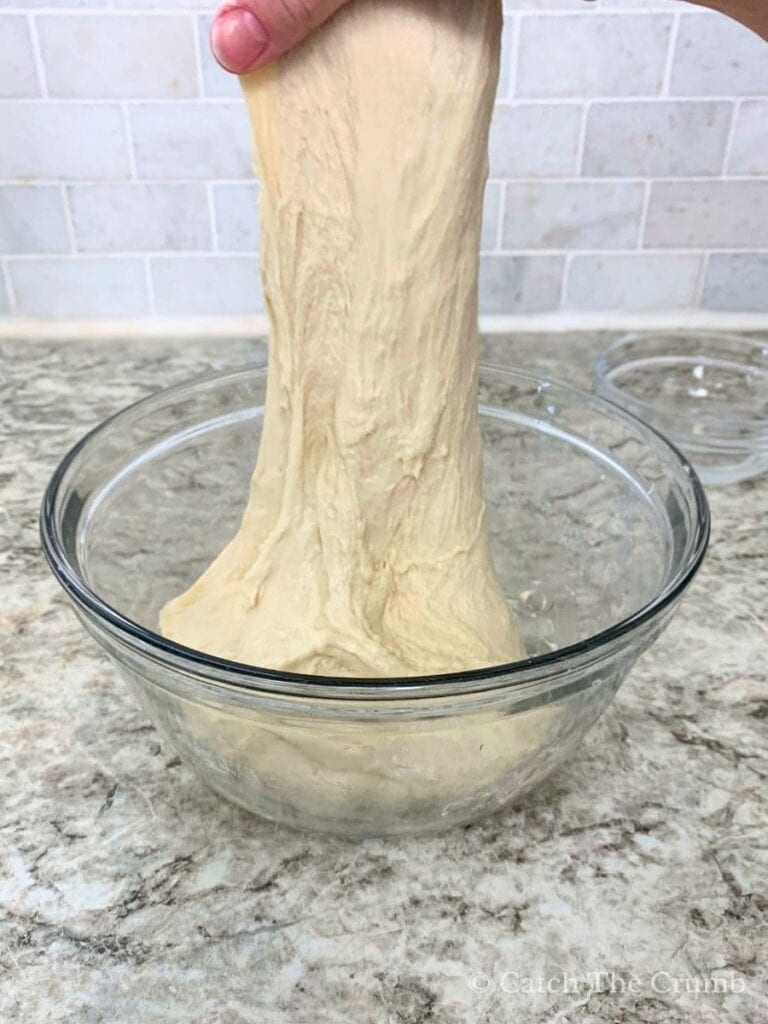
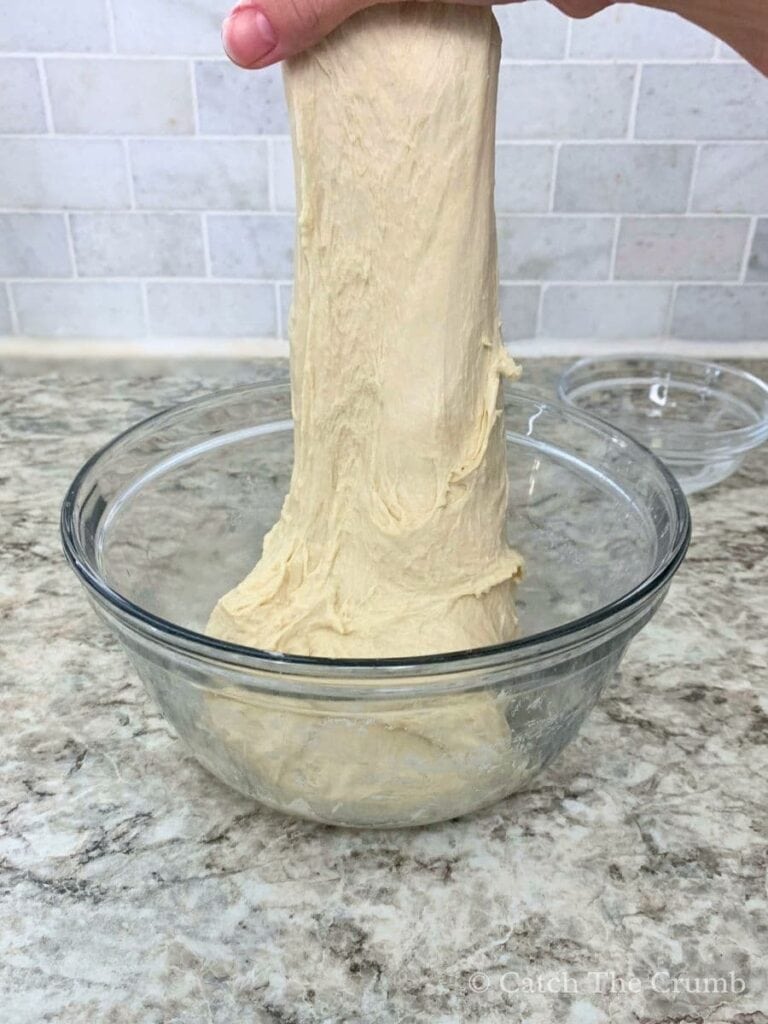
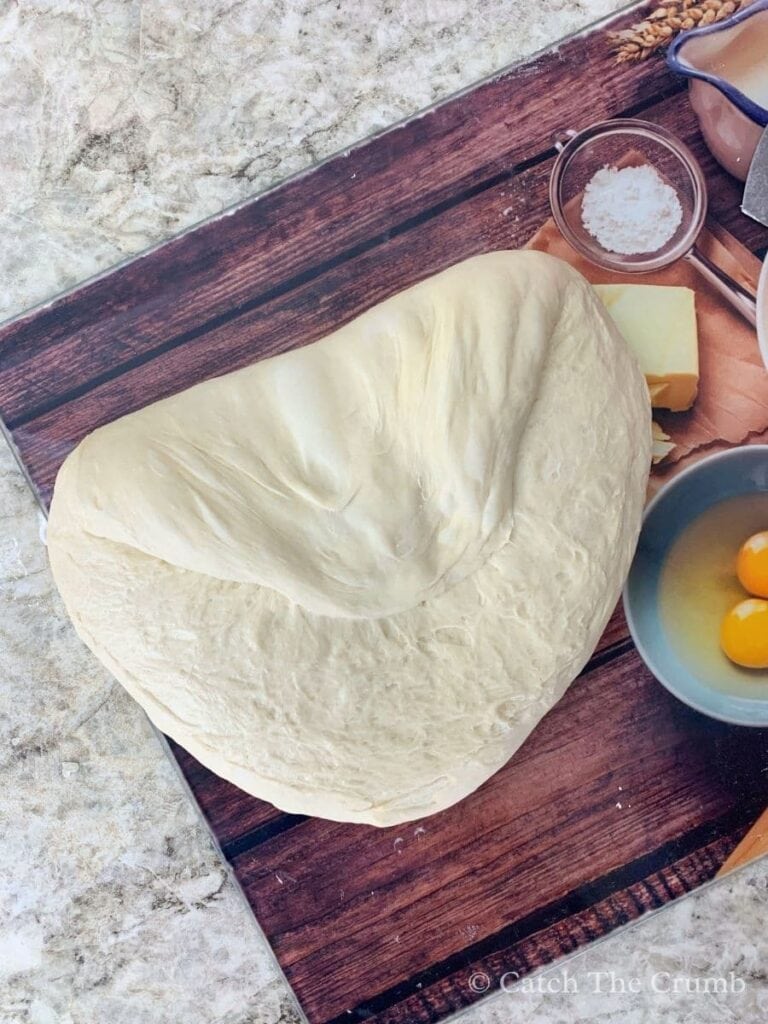
Step 3: Stretch and Folds
After your dough has rested for an hour, it’s time to help it build strength, and that’s where stretch and folds come in. This technique gently develops the gluten without kneading and helps your dough hold its shape as it rises.
You’ll complete 3 to 4 sets of stretch and folds, spaced about 30 minutes apart. Four is ideal for structure, but three will still get you great results.
Here’s how to do one set:
- Wet your hands first to help prevent sticking.
- Grab one side of the dough, gently stretch it upward (don’t tear it!), and fold it back over the dough.
- Rotate the bowl a quarter turn and repeat.
- Continue this for 4 to 8 stretches total, or until the dough starts to feel tight and resists stretching. Once that happens, stop. Overstretching can tear the dough.
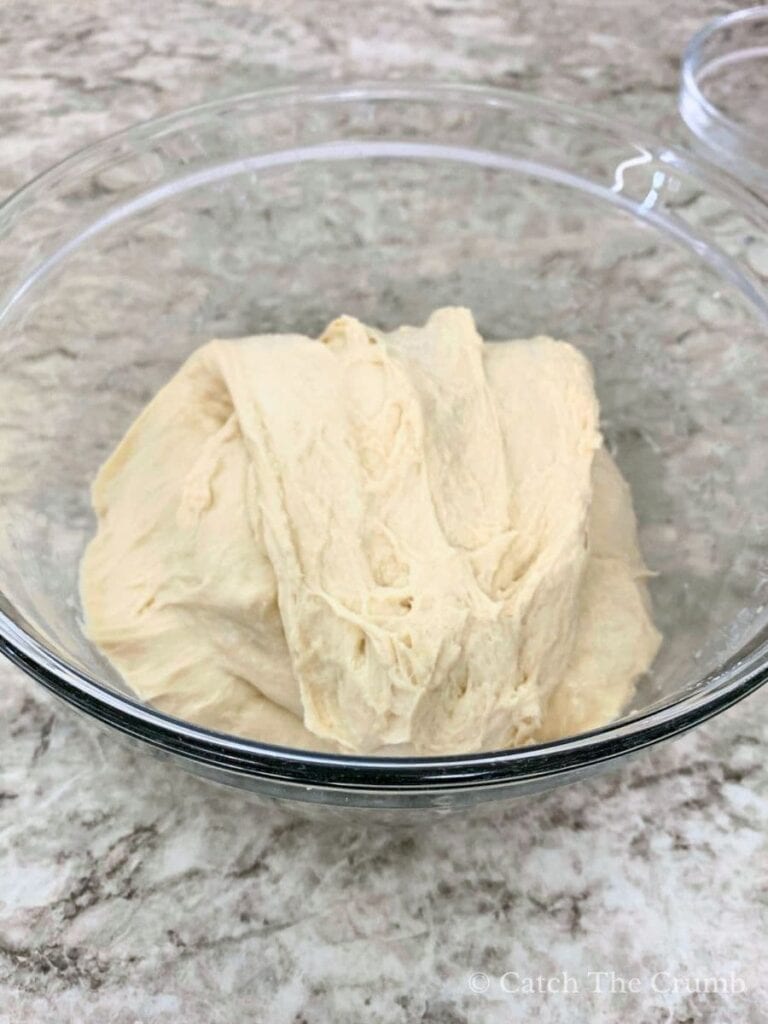
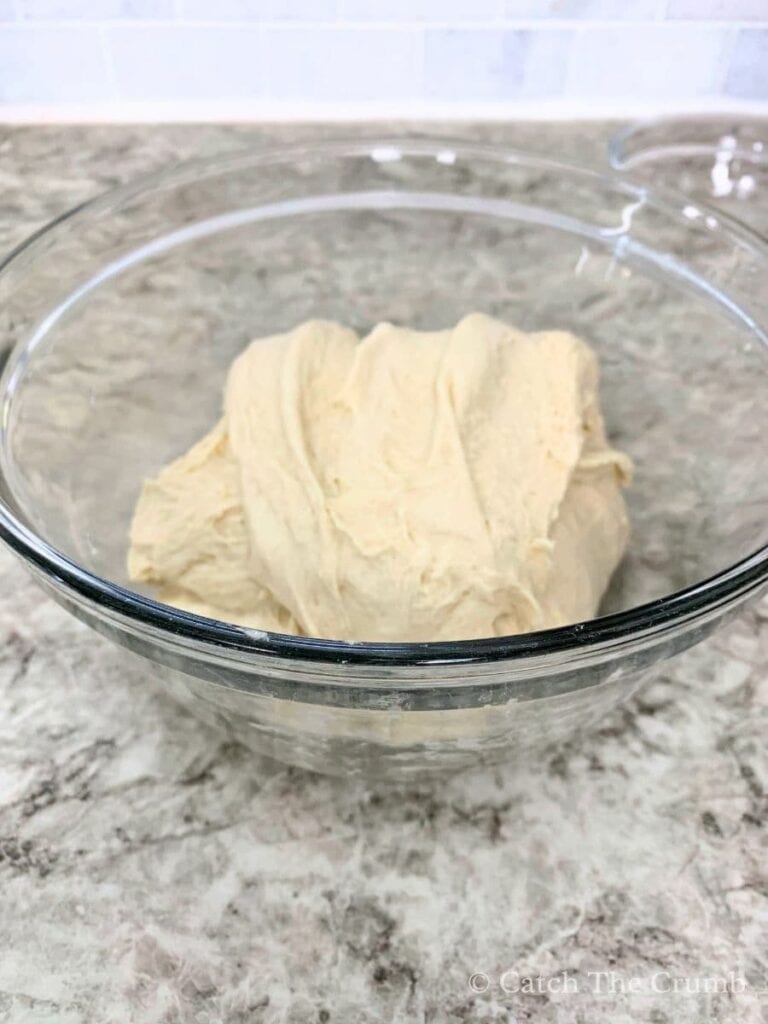
If you’d like, you can flip the dough over and gently tuck the edges underneath to create a neater, round shape. Totally optional.
After each set, cover your bowl again with a damp towel, plastic wrap, or bowl cover and let the dough rest for another 30 minutes before the next round.
Quick Tips:
If you’re adding any solid mix-ins like seeds, nuts, or savory extras like jalapeño and cheddar, the third round of stretch and folds is the best time. Just steer clear of anything too sugary or liquid (like cinnamon sugar), which can make the dough overly sticky and hard to work with.
These stretch and folds are one of the simplest and most satisfying parts of the sourdough process. Each round of stretch and folds brings your dough to life, turning it from a rough, shaggy mass into a smooth, elastic beautiful dough ready to rise.
I like to keep my dough around 80°F (27°C) during bulk fermentation. It’s a sweet spot for strong gluten development and good rise. At each stretch and fold, I do a quick check with my kitchen thermometer to make sure the dough is staying in that range. If it’s running cool, I’ll move the bowl to a warmer spot in the kitchen or wrap it in a tea towel to help maintain temperature.
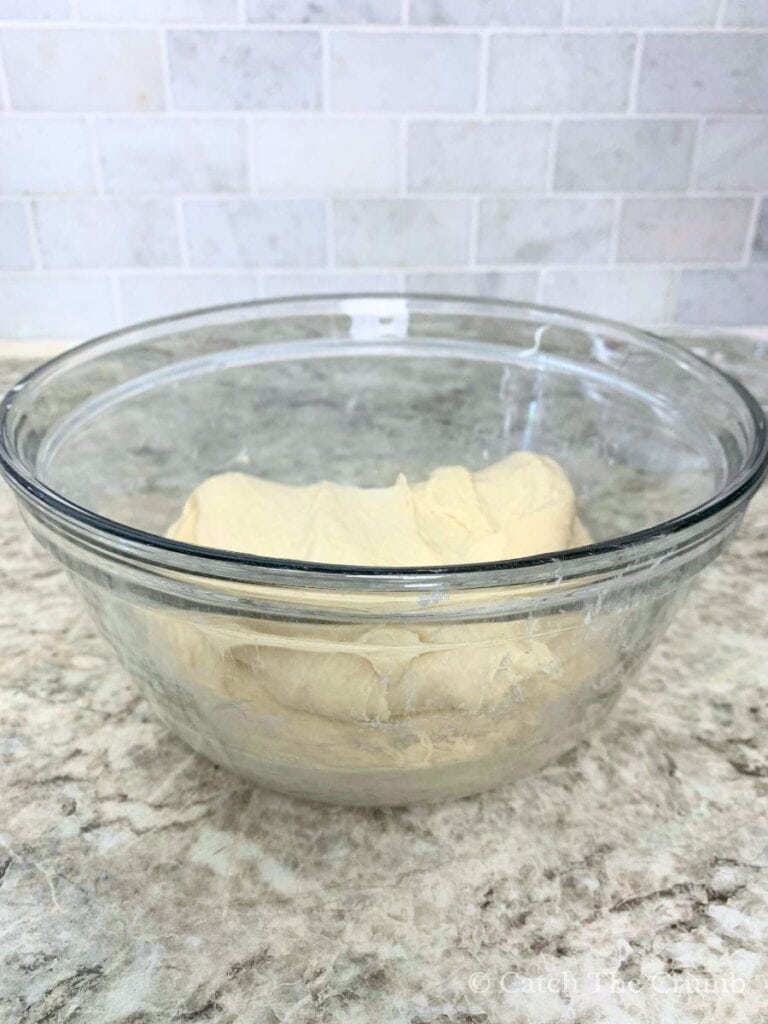
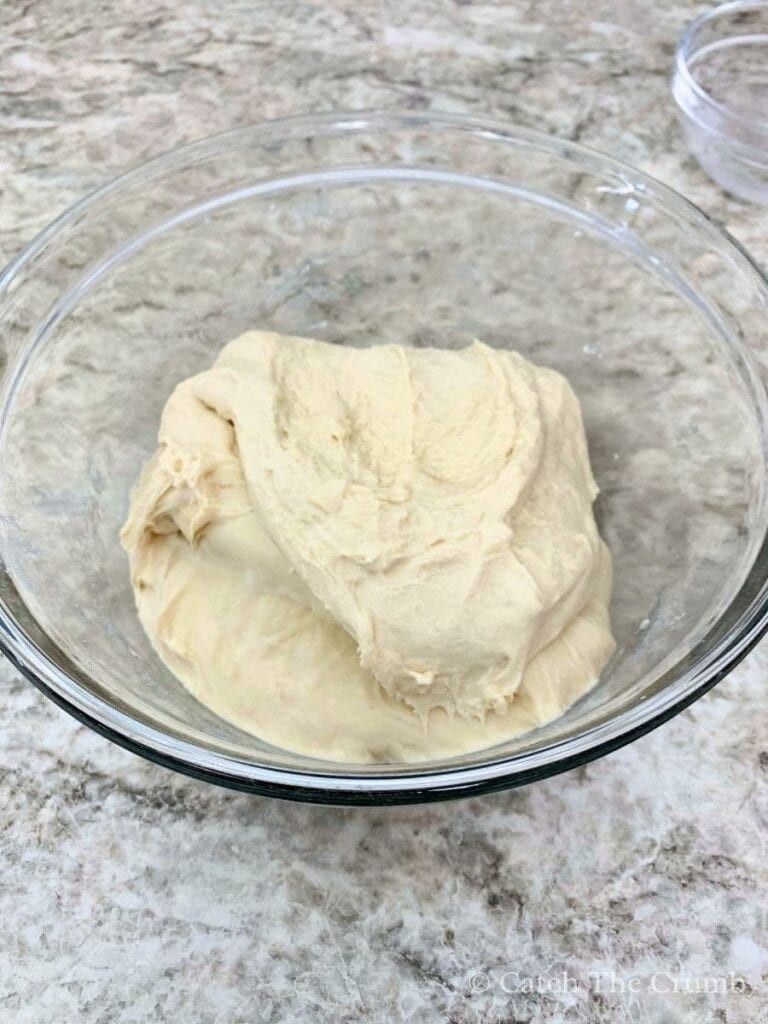
Step 4: Bulk Fermentation
Remember that bulk fermentation started once all of your ingredients were mixed together. We noted the time at the end of step 2. If you just finished your 4th round of stretch and folds, you should be about 2.5 hours into bulk fermentation already.
This part is where the dough truly comes to life. Over the next couple hours, it’ll slowly rise, develop flavor, and build the strength it needs to hold its shape. Bulk fermentation can take anywhere from 4 to 12 hours, depending mostly on the temperature of your dough. So rather than watching the clock, we’re going to learn to watch the dough.
What You’re Looking For
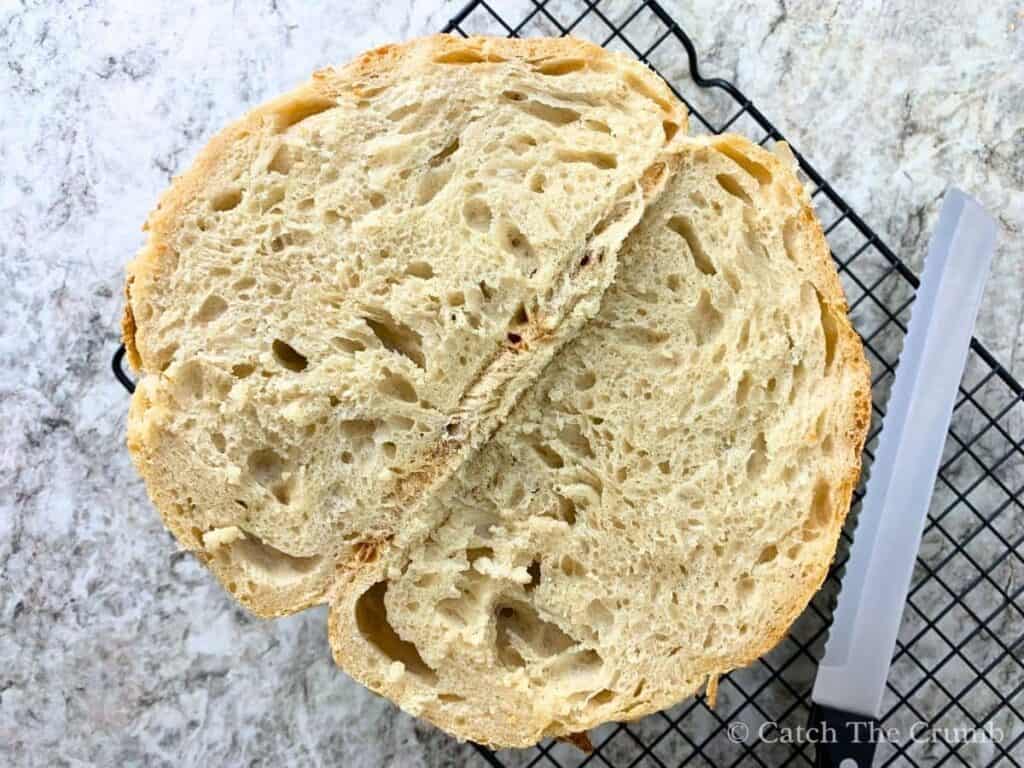
Well-fermented dough should look:
- Puffy and airy
- Slightly domed at the top
- Pulled just slightly away from the sides of the bowl
- Covered in small bubbles, especially around the edges and bottom
- Soft and smooth to the touch, not super sticky or tight
If you give the bowl a gentle shake, it should jiggle a little like a water balloon. That’s a great sign.
How Long Will It Take?
There’s no one-size-fits-all answer—and that’s what makes this part a little tricky at first. Bulk fermentation time depends heavily on dough temperature.
In general, if your dough is sitting around 78–80°F, bulk fermentation usually takes about 4 to 5 hours. If your dough is cooler, say around 75°F, it’ll take a bit longer, more like 5 to 7 hours.
The best approach? Watch your dough, not the clock.
A great resource that breaks this all down is this sourdough bulk fermentation guide by The Sourdough Journey. It walks through temperature ranges, rise percentages, and estimated times to help you get a better feel for how long it might take in your kitchen.
Tips for Managing Dough Temperature
Temperature is key. If your dough is cooler (say around 75°F), aim for a bit more rise, closer to 50%. If it’s warmer (around 80°F), you’re shooting for a 30 – 40% rise.
Here are a few ways I manage dough temp:
- Use a kitchen thermometer to check the dough occasionally.
- Keep the bowl in a warm spot, like inside your oven with just the light on. Don’t turn the oven on!!
- Or use a dough mat (warming mat) with a built-in thermostat. It keeps your dough the exact temperature that you’d like.
Honestly, controlling dough temp has been one of the biggest game changers in my sourdough baking. Once I found what worked for my kitchen, everything got a whole lot easier.
Final Tip: Trust the Dough
Learning to read your dough is a skill that comes with time, and every bake teaches you something new. Don’t stress about getting it perfect the first go. Instead of obsessing over the hours, keep your focus on how the dough looks and feels. If it’s puffy, jiggly, and full of life, you’re ready for the next step.
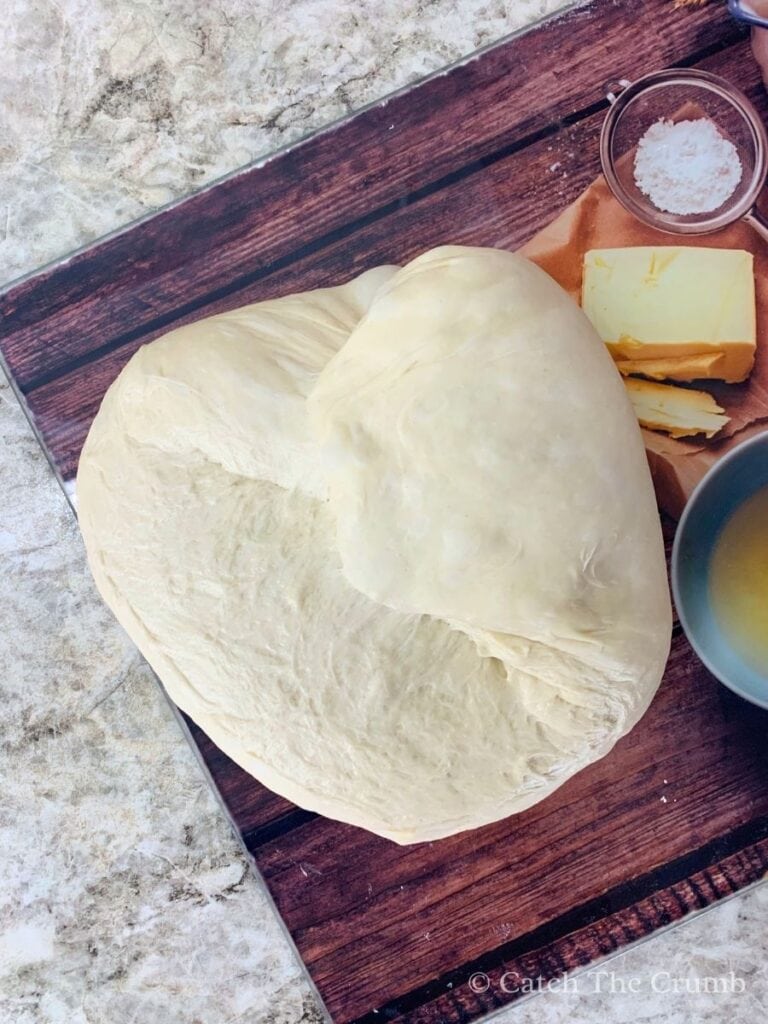
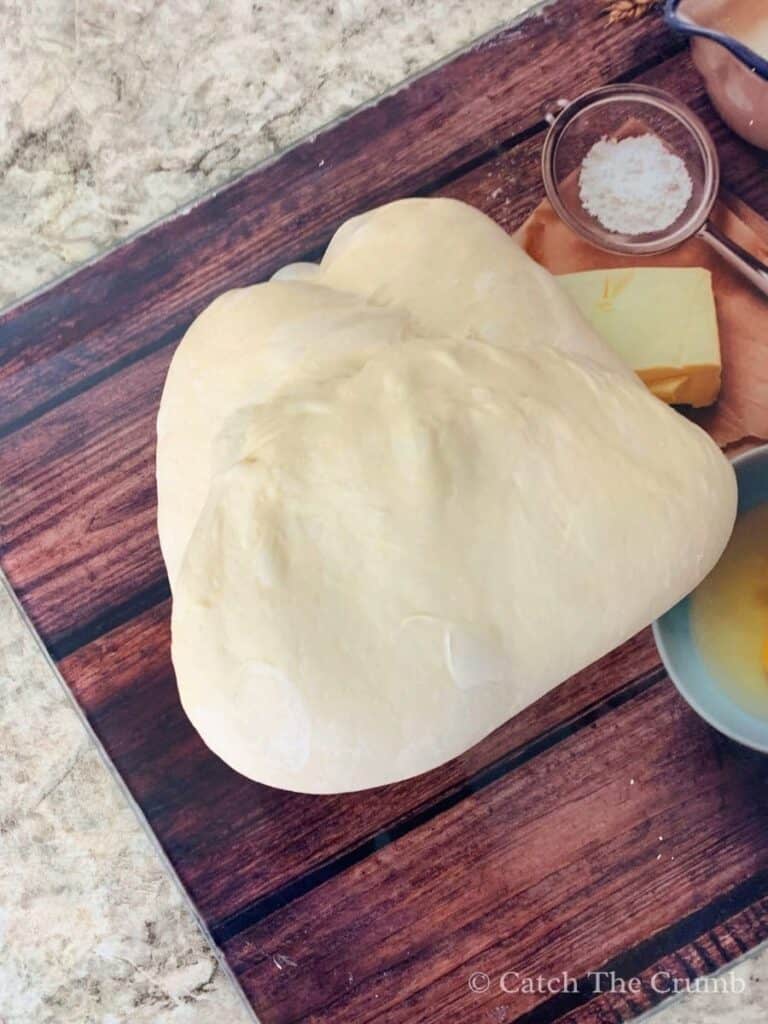
Step 5: Preshape Your Dough
Once your dough has puffed up, feels jiggly when you give the bowl a little shake, and shows lots of bubbles along the sides and bottom, it’s time to move on to preshaping. You’ll also notice the dough pulling slightly away from the edges of the bowl when you tilt it. That’s a great sign it’s ready!
We’re going to gently shape the dough into a round form, let it rest, and then come back to do the final shaping. Doing this helps your dough hold structure and gives you that lofty, beautiful oven spring in the end.
Here’s how to do it:
- Lightly flour your work surface (VERY LIGHTLY)
- Turn your dough out onto the counter.
- Now, use your hands and the bench scraper to gently round the dough into a loose ball. Gently push the dough up and away from you at a slight angle, then pull it back toward your body to create tension across the surface. You’re not kneading, just coaxing it into a tighter shape. Repeat this motion a few times as you rotate the dough to create a smooth, round shape.
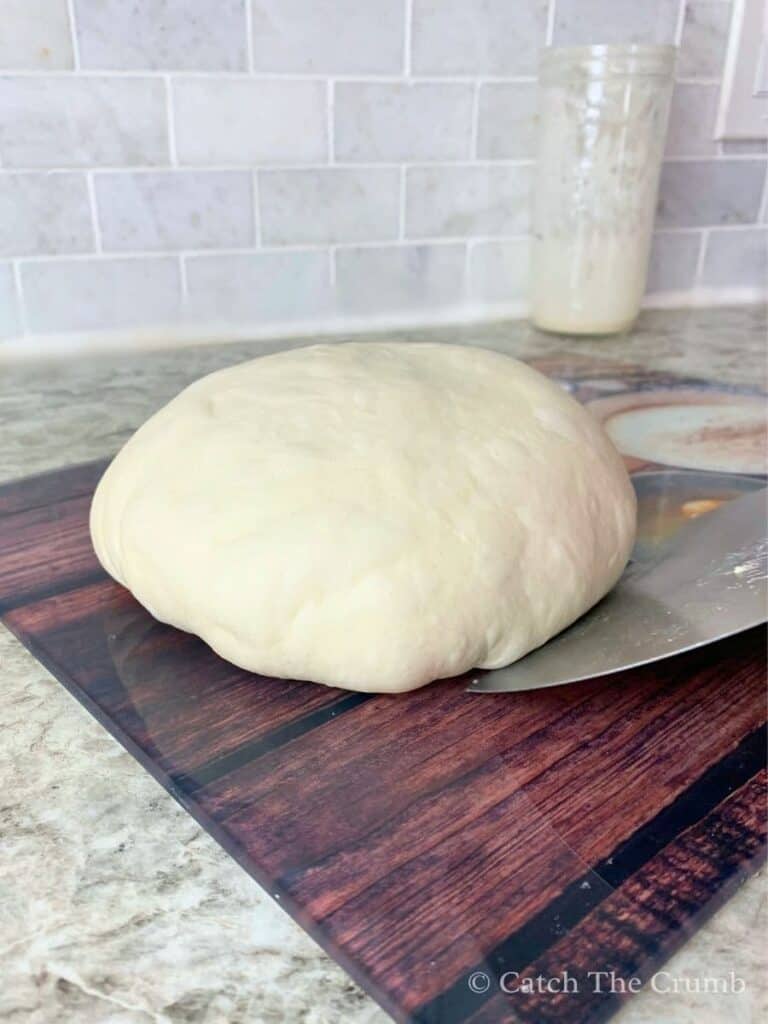
You’ll likely see small bubbles forming near the surface. Those are great! Don’t pop them or worry about them.
Let the shaped dough rest uncovered for about 20 minutes. This short break lets the gluten relax and makes the final shaping a whole lot easier.
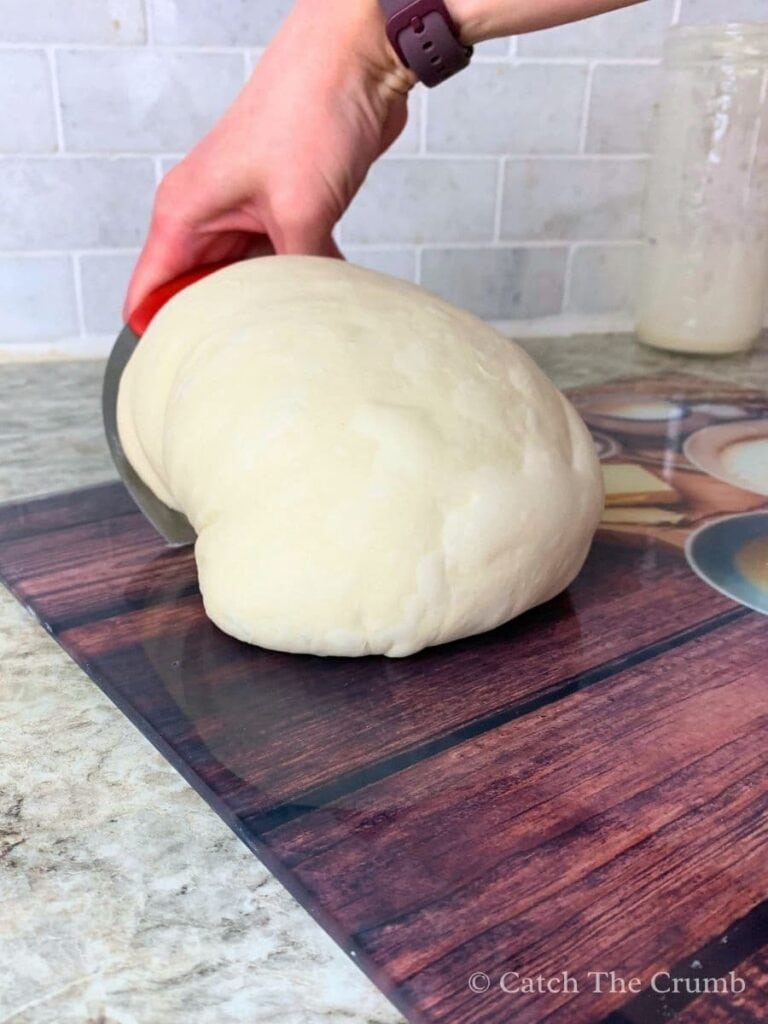
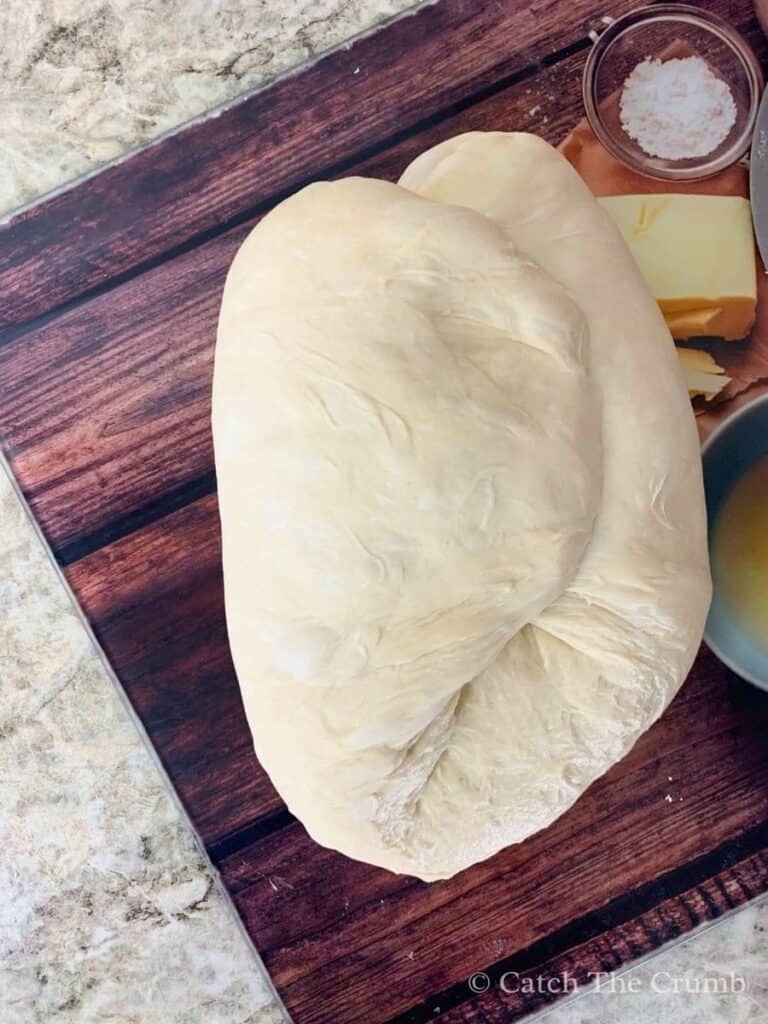
Step 6: Final Shape
After your dough has rested for about 20 minutes, it’s time to shape it for its final rise.
Start by sliding your bench scraper under the dough and gently flipping it over so the smooth side is now facing down and the sticky side is up.
Now we’re going to fold the dough in on itself to build structure:
- Fold one side into the center.
- Then fold the opposite side in.
- Repeat with the remaining two sides until you’ve tucked in all four.
- Carefully flip the dough back over so the seam is now on the bottom.
Using your hands or bench scraper, gently pull the dough toward you and rotate it slightly, coaxing it into a smooth, tight ball. This step builds surface tension, which helps the loaf keep its shape as it bakes.
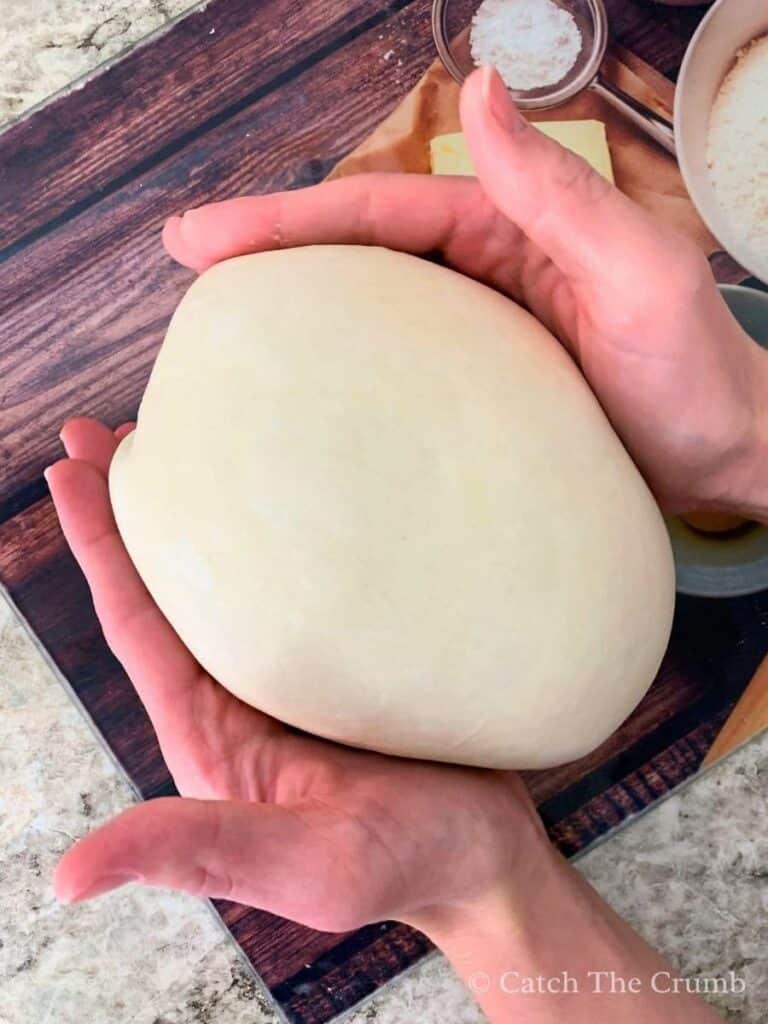
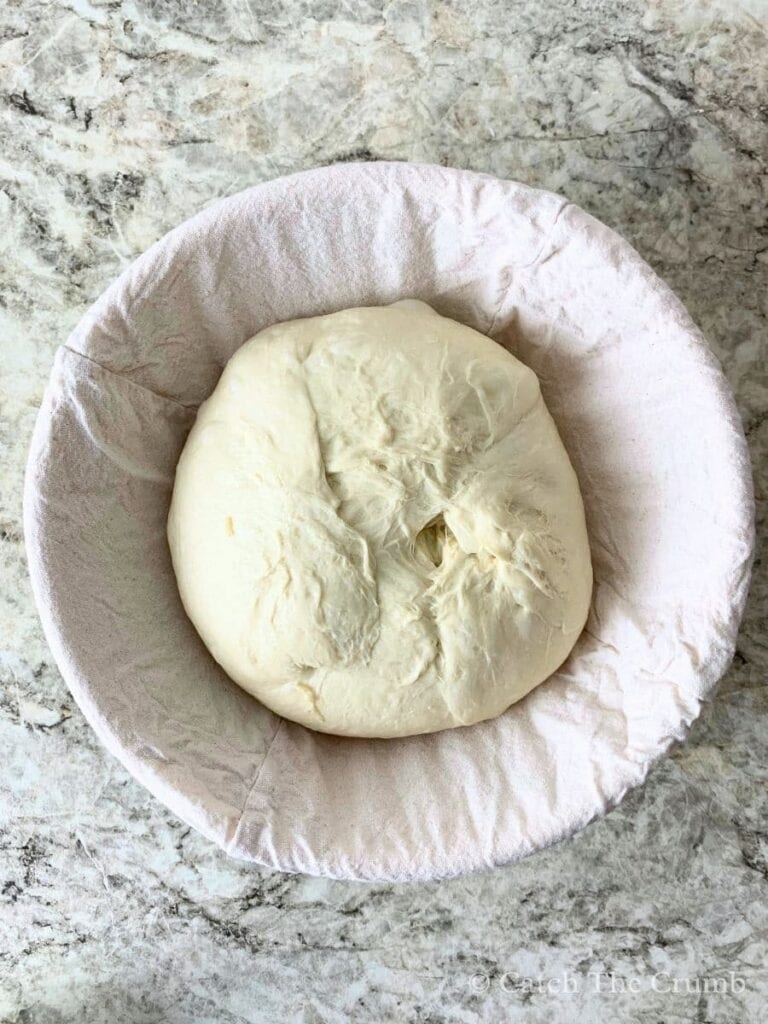
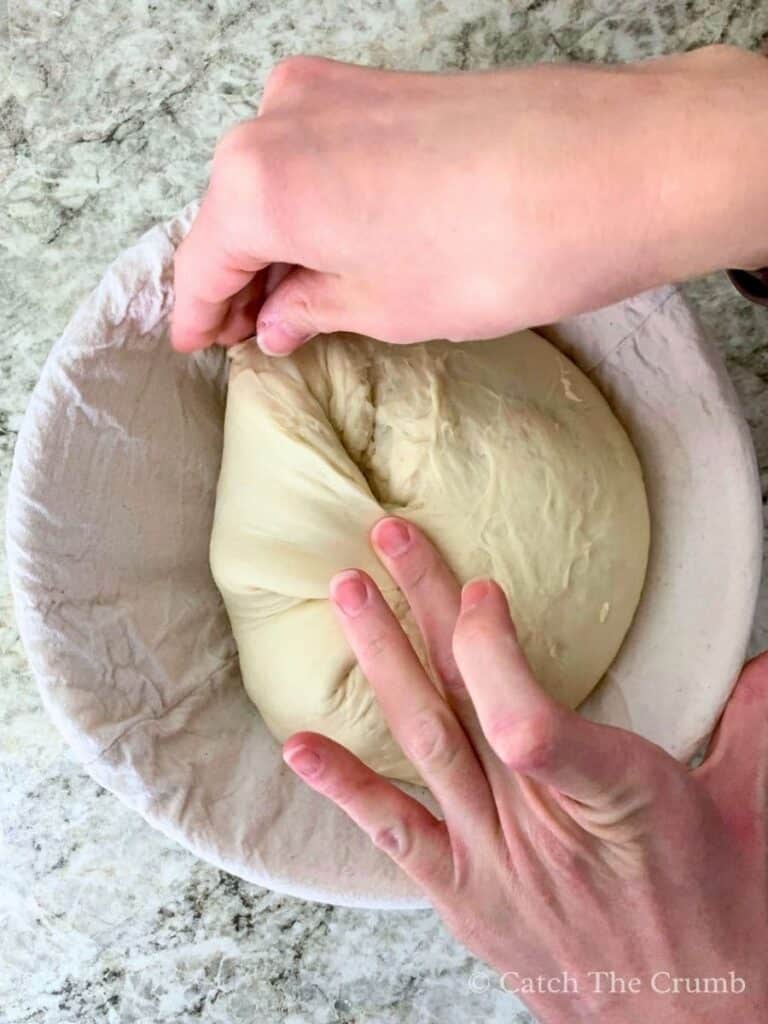
Place your dough into a floured banneton or a colander lined with a well-floured towel seam side up.
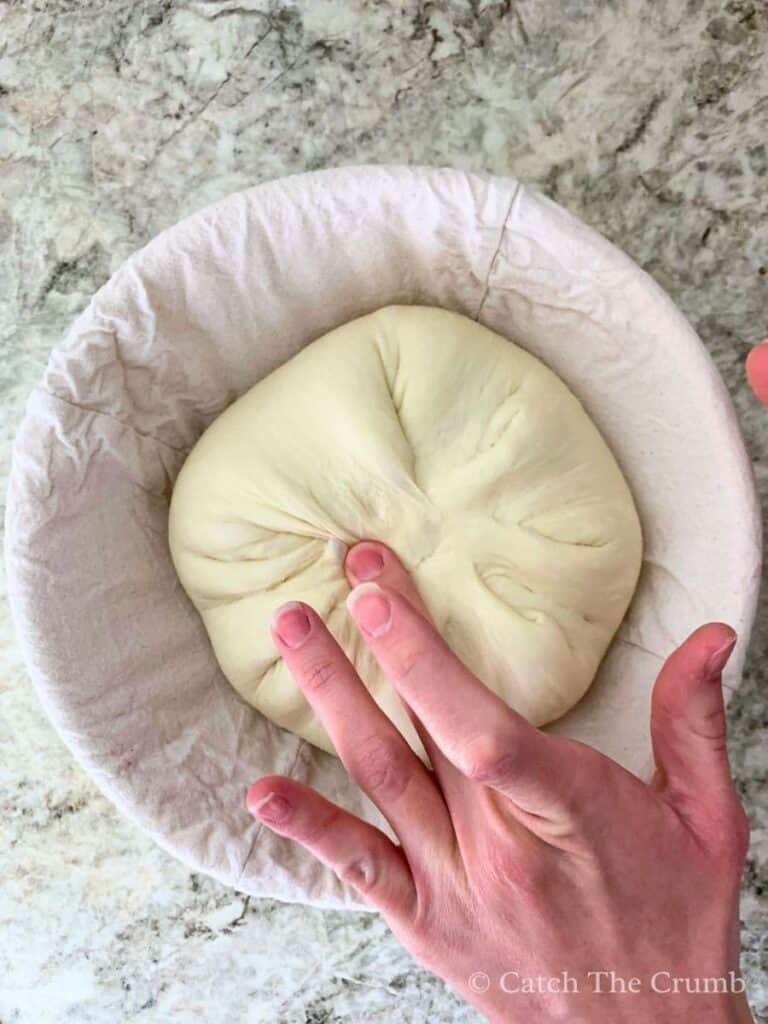
Let it sit in the basket for about 10–15 minutes. Then, gently pinch or press the seams together a bit more to help seal the bottom. This simple step (often called “stitching”) helps maintain tension on the top of the dough for a taller bake.
Cover your dough with a shower cap, bowl cover, or plastic bag to prevent it from drying out during the cold proof.
Step 7: Cold Retard
Once your dough is shaped and resting in its banneton, it’s time for a long, cool nap in the fridge. This slow proofing stage is where the magic deepens, giving your sourdough incredible flavor and making it easier to handle when it’s time to bake.
Cover the banneton and pop it in the fridge overnight. I find baking it the next day is the best tasting bread, but it can stay in the fridge for up to 48 hours if life gets busy. The longer it chills, the more depth and tang your loaf will develop.
The best part? This step adds flexibility to your baking schedule so that you’re not tied to the kitchen clock!
Step 8: Time to Score and Bake!
You’re in the home stretch! Let’s get that beautiful dough into the oven!
Start by preheating your oven to 450°F (232°C) with your Dutch oven inside on the center rack. For the best oven spring, let the Dutch oven heat for at least 20–30 minutes after the oven says it’s preheated. If you have a heavy duty baking sheet, place it on the rack underneath to help keep the bottom of your bread from over-browning.
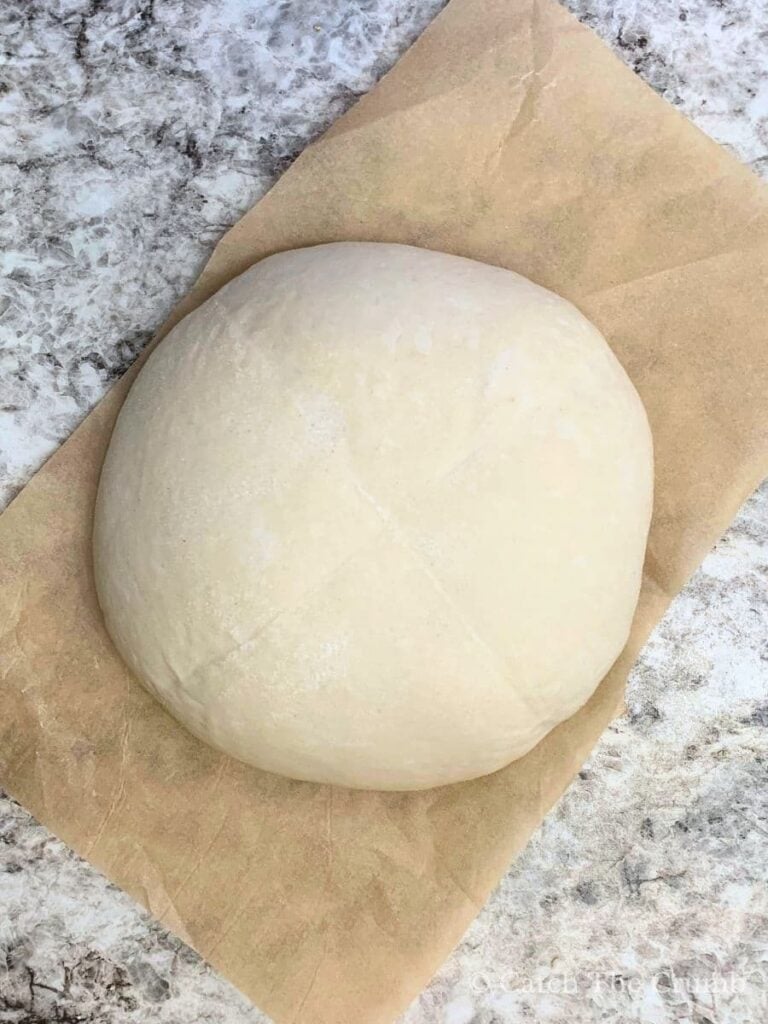
Once your oven and Dutch oven are blazing hot, grab your dough straight from the fridge. Lay a piece of parchment paper or a sourdough baking mat over the top of your banneton, then gently flip it over onto the counter. Lift off the banneton to reveal your chilled dough.
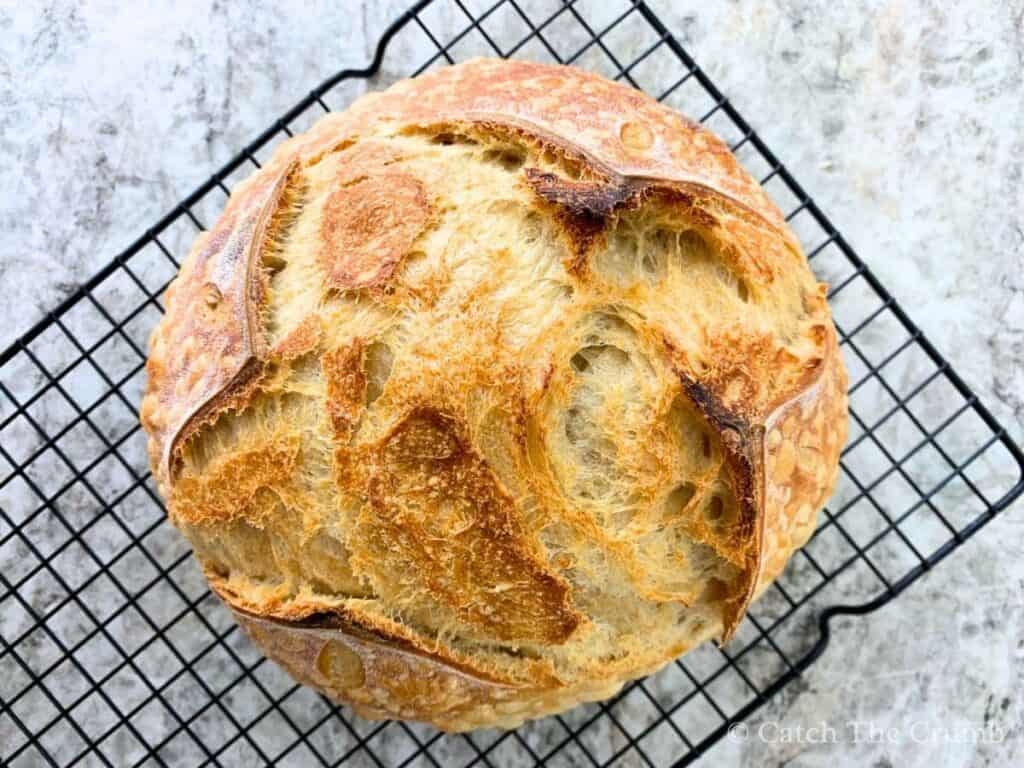
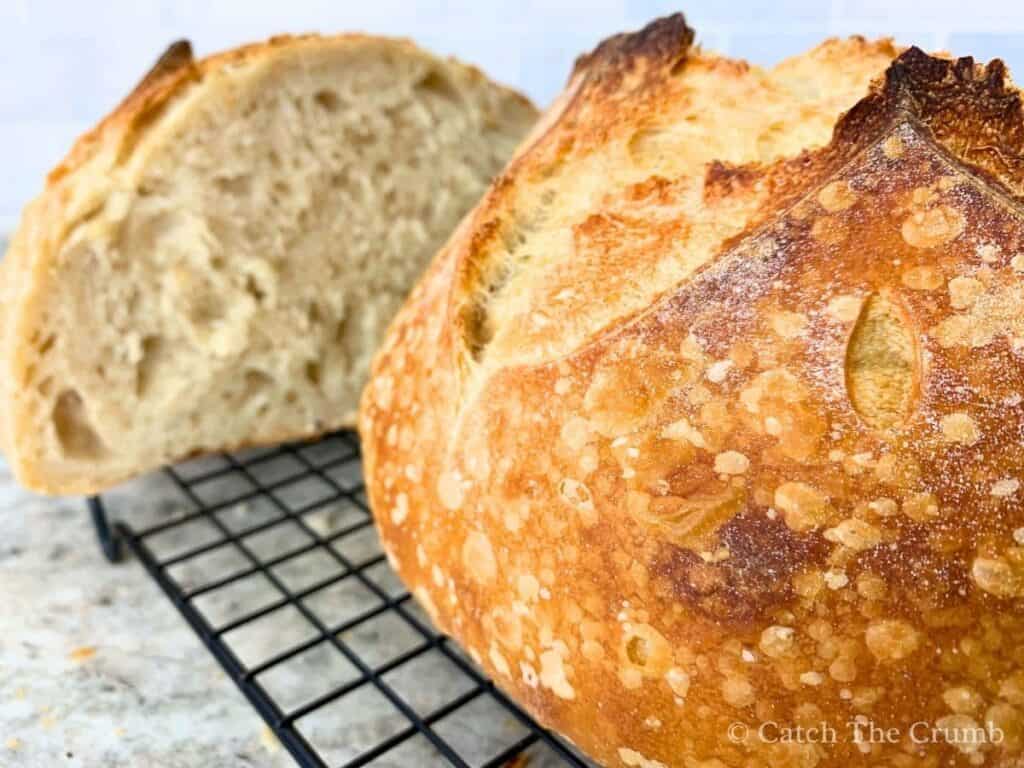
Now it’s time to score. Using a bread lame or sharp razor, make a deep slash along the top of your dough. This is the “expansion score” that allows the loaf to rise in the oven. You can add a few extra decorative cuts too, just for fun!
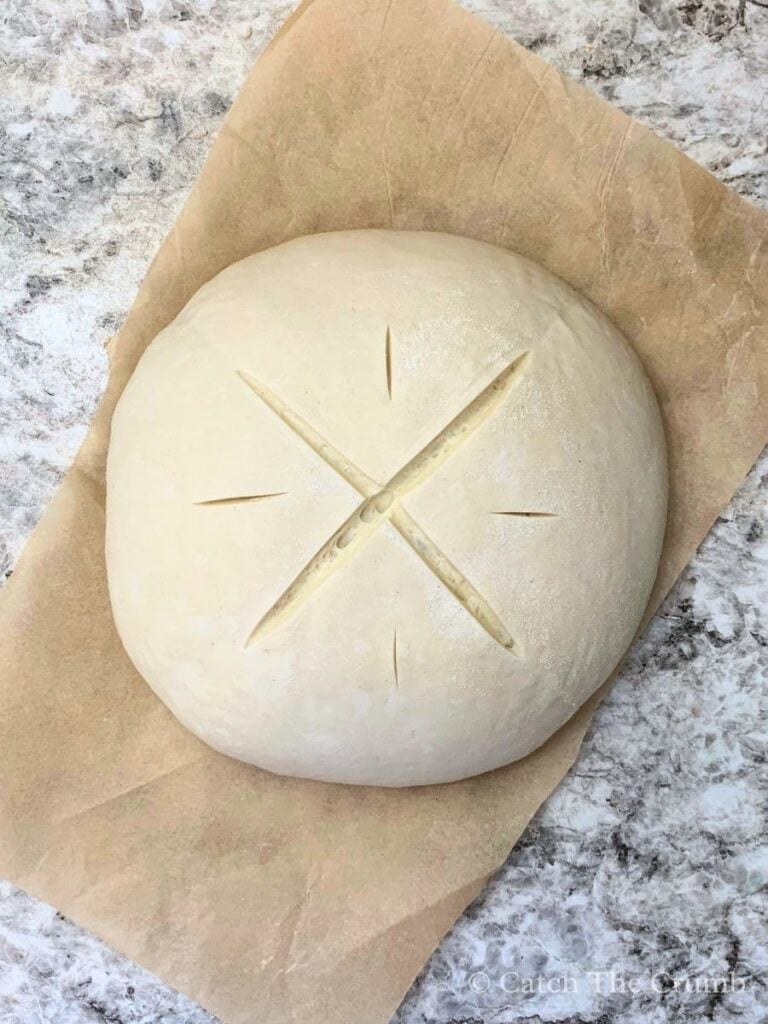
Carefully (remember your dutch oven is VERY hot) lift your dough (using the parchment as a sling) into the preheated Dutch oven. Using oven mitts cover it with the lid and bake for 30 minutes.
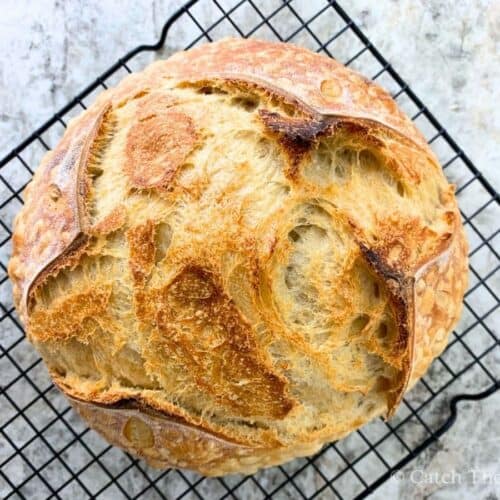
After 30 minutes, remove the lid and bake for another 12 – 15 minutes, or until the crust is a deep golden brown. The inside of your loaf should reach between 205°F and 210°F when it’s fully baked.
Transfer your baked loaf to a wire rack and let it cool for at least an hour before slicing (I know it’s hard to wait, but cutting too early can lead to a gummy interior).
You did it! You just baked sourdough from scratch and it’s going to be amazing!
Easiest Sourdough Bread Recipe
Ingredients
- 75g active sourdough starter (fed and bubbly)
- 330g warm water (about 90°F)
- 500g unbleached all-purpose flour
- 10g sea salt
Instructions
- The night before, feed your starter using a 1:5:5 ratio (10g starter + 50g flour + 50g water). Let it sit at room temp until doubled, airy, and just starting to flatten on top. Generally your starter will take about 10-12 hours using a 1:5:5 ratio. Tip: A spoonful should float in water when it’s ready (float test).
- In a large bowl, stir together 330g warm water (around 90°F) and 75g active starter until cloudy. Add 500g all-purpose flour and 10g salt. Mix until all dry bits are gone and a shaggy dough forms. Take note of the time, this is the start of bulk fermentation. Cover and rest for 1 hour.
- Perform 3 – 4 sets of stretch and folds, 30 minutes apart, take the temperature of your dough after each stretch and fold. We are aiming to keep our dough around 78–80°F. After your final set, cover the dough and let it rise until it looks puffy, jiggly, and bubbly (typically 4–5 hours total from the time that all ingredients have been mixed at 78–80°F).
- Gently turn dough onto a lightly floured surface and shape into a loose round. Let it rest uncovered for 20 minutes.
- Flip the dough over, fold in all 4 sides, then flip back so the seam is down. Use your hands to tighten into a smooth round. Place seam side up into a floured banneton or towel-lined bowl.
- Cover and refrigerate overnight (up to 48 hours). This slows fermentation, deepens flavor, and makes the dough easier to bake.
- Preheat oven to 450°F (232°C) with a Dutch oven inside for at least 30 minutes. Place a heavy duty baking sheet on the rack below your dutch over, this helps the bottom of your loaf from getting too brown. Flip dough onto the parchment paper, score, and carefully place in the hot Dutch oven. Bake covered for 30 minutes, then uncover and bake for 12–15 minutes until deep golden brown and 205 – 210°F internally.
- Let your loaf cool on a wire rack for at least 1 – 2 hours before slicing. Slicing too soon can lead to a gummy interior.
Notes
- For best results, use a kitchen scale to weigh all ingredients. Accuracy makes a big difference.
- Dough temperature is key! If your kitchen is cool, try using slightly warmer water or placing your bowl in a warmer spot.
- The surface of the dough should feel smooth and elastic after bulk fermentation.
- If you’re making your first loaf of sourdough bread, it’s a good thing to jot down what worked and what you’d try differently next time.
Did you try this recipe? I’d love to see how it turned out! Leave a comment below and tag @catchthecrumbsourdough on Instagram to show it off!